Overview
Although Singular is designed for cloud-based workflows, it can work with HD-SDI for traditional broadcast. Singular works with all the major brands and operating systems and with our open environment, you can create your own custom solution.
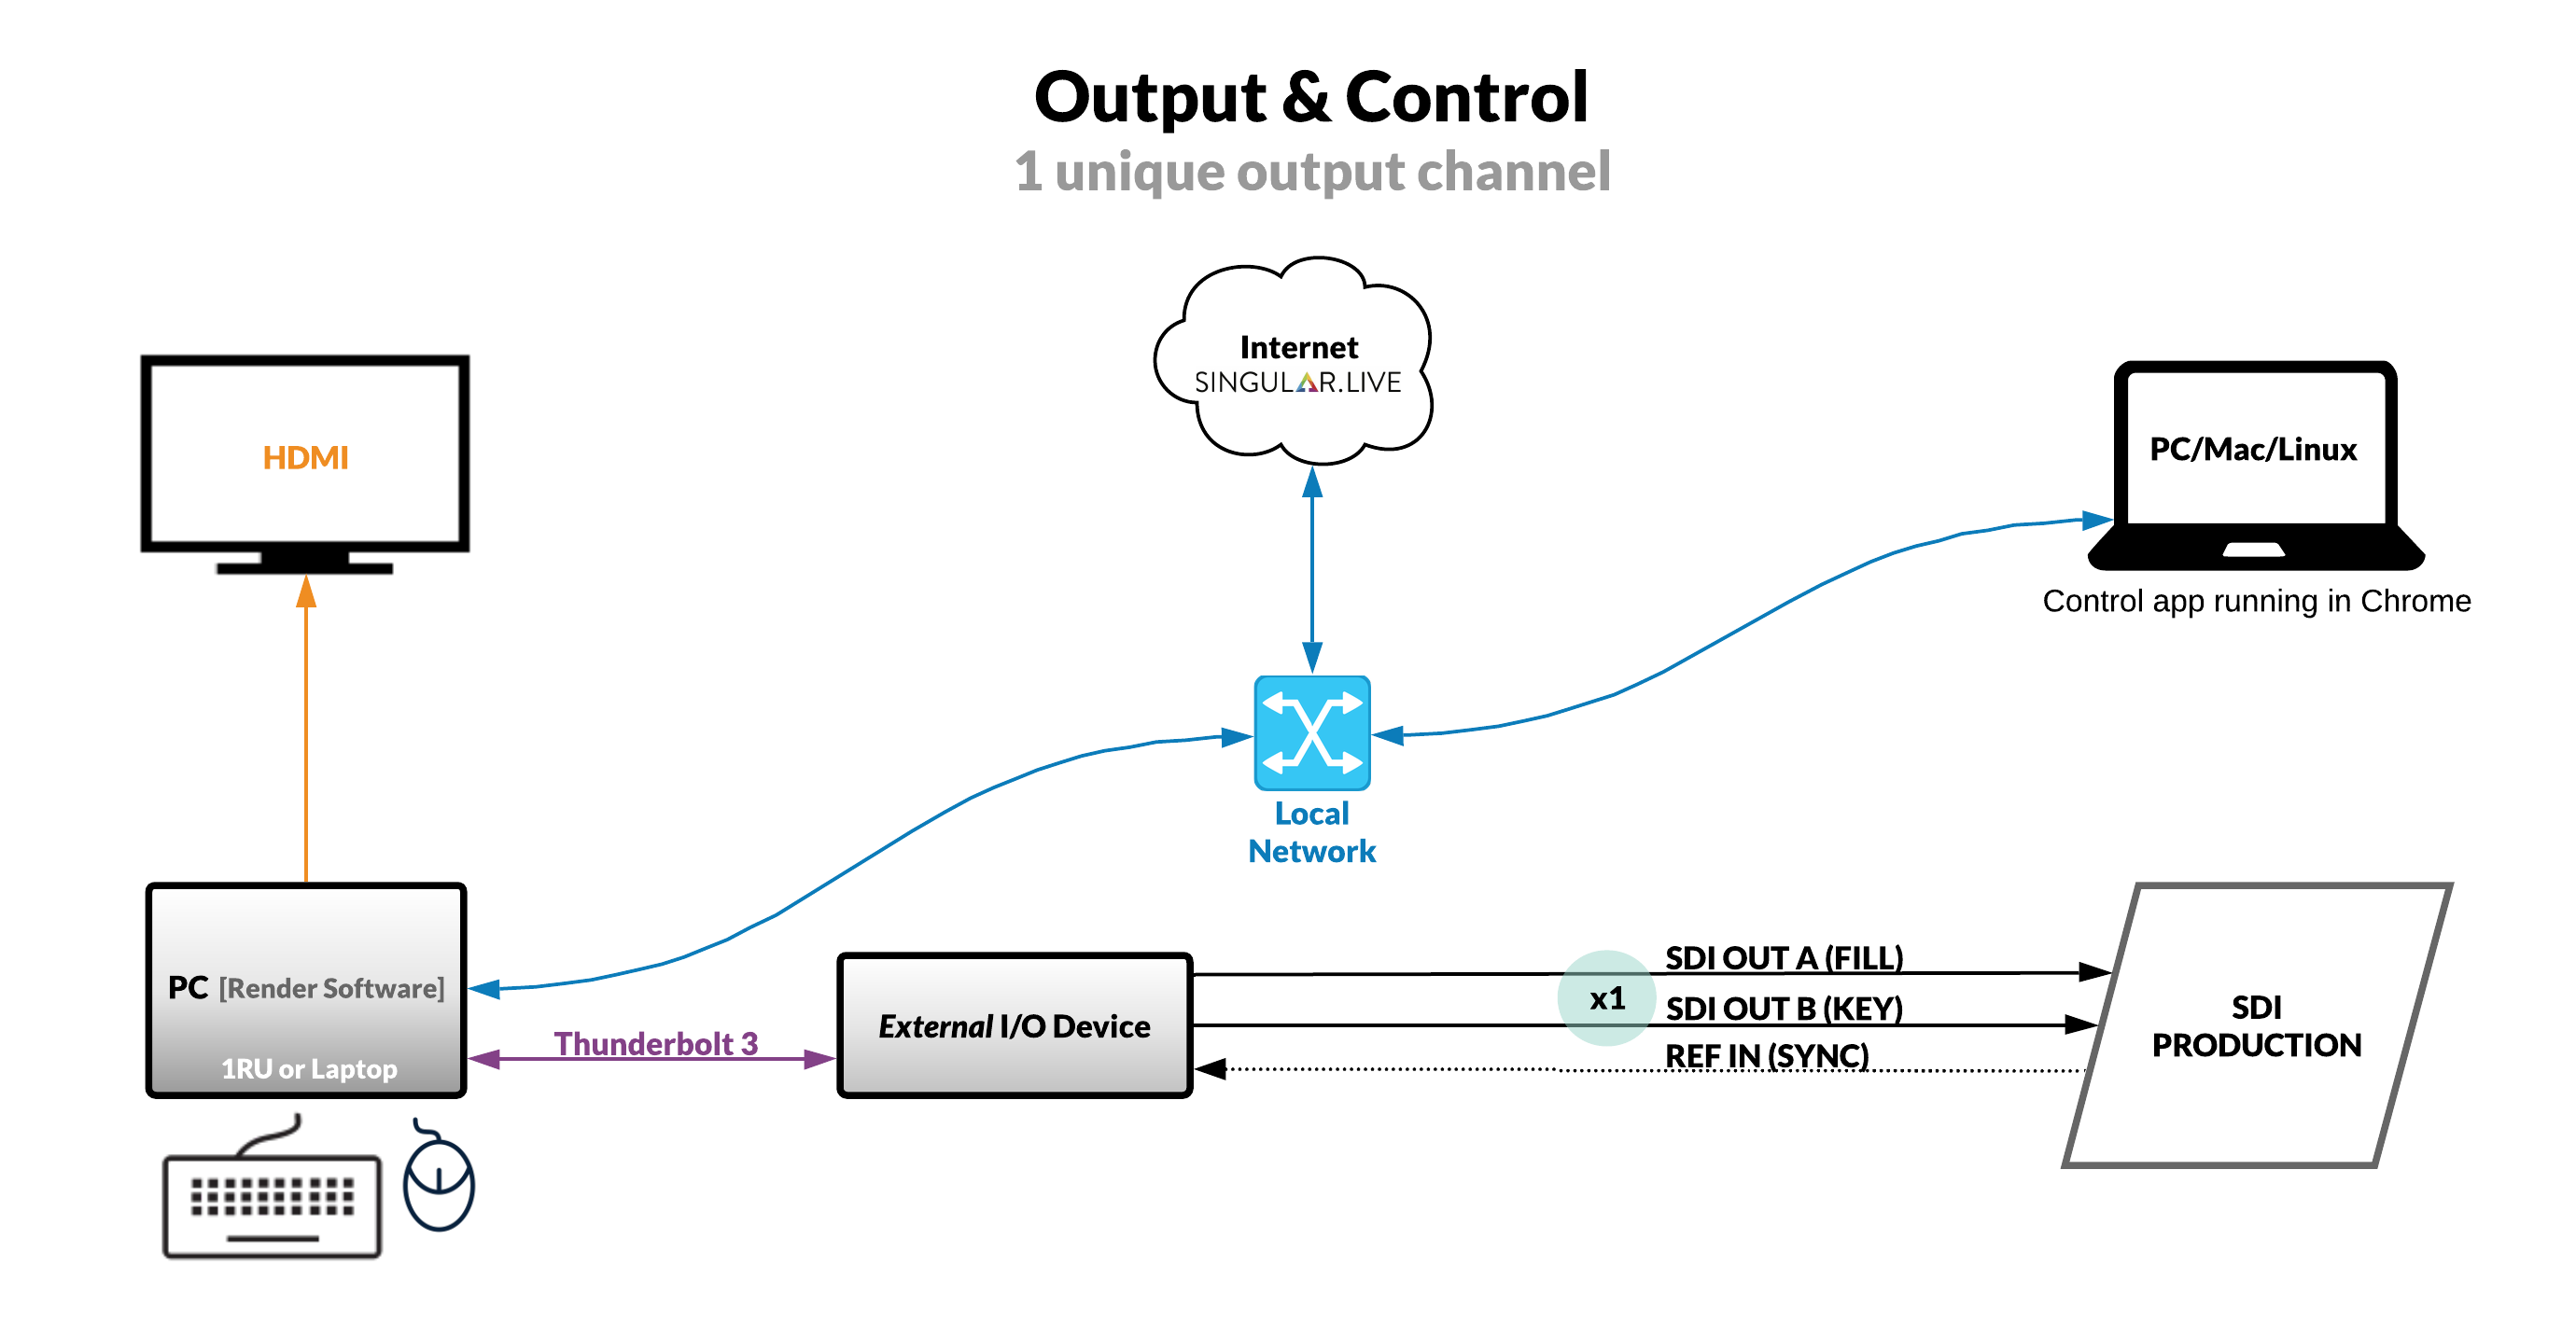
Singular to HD-SDI workflow - External I/O Device
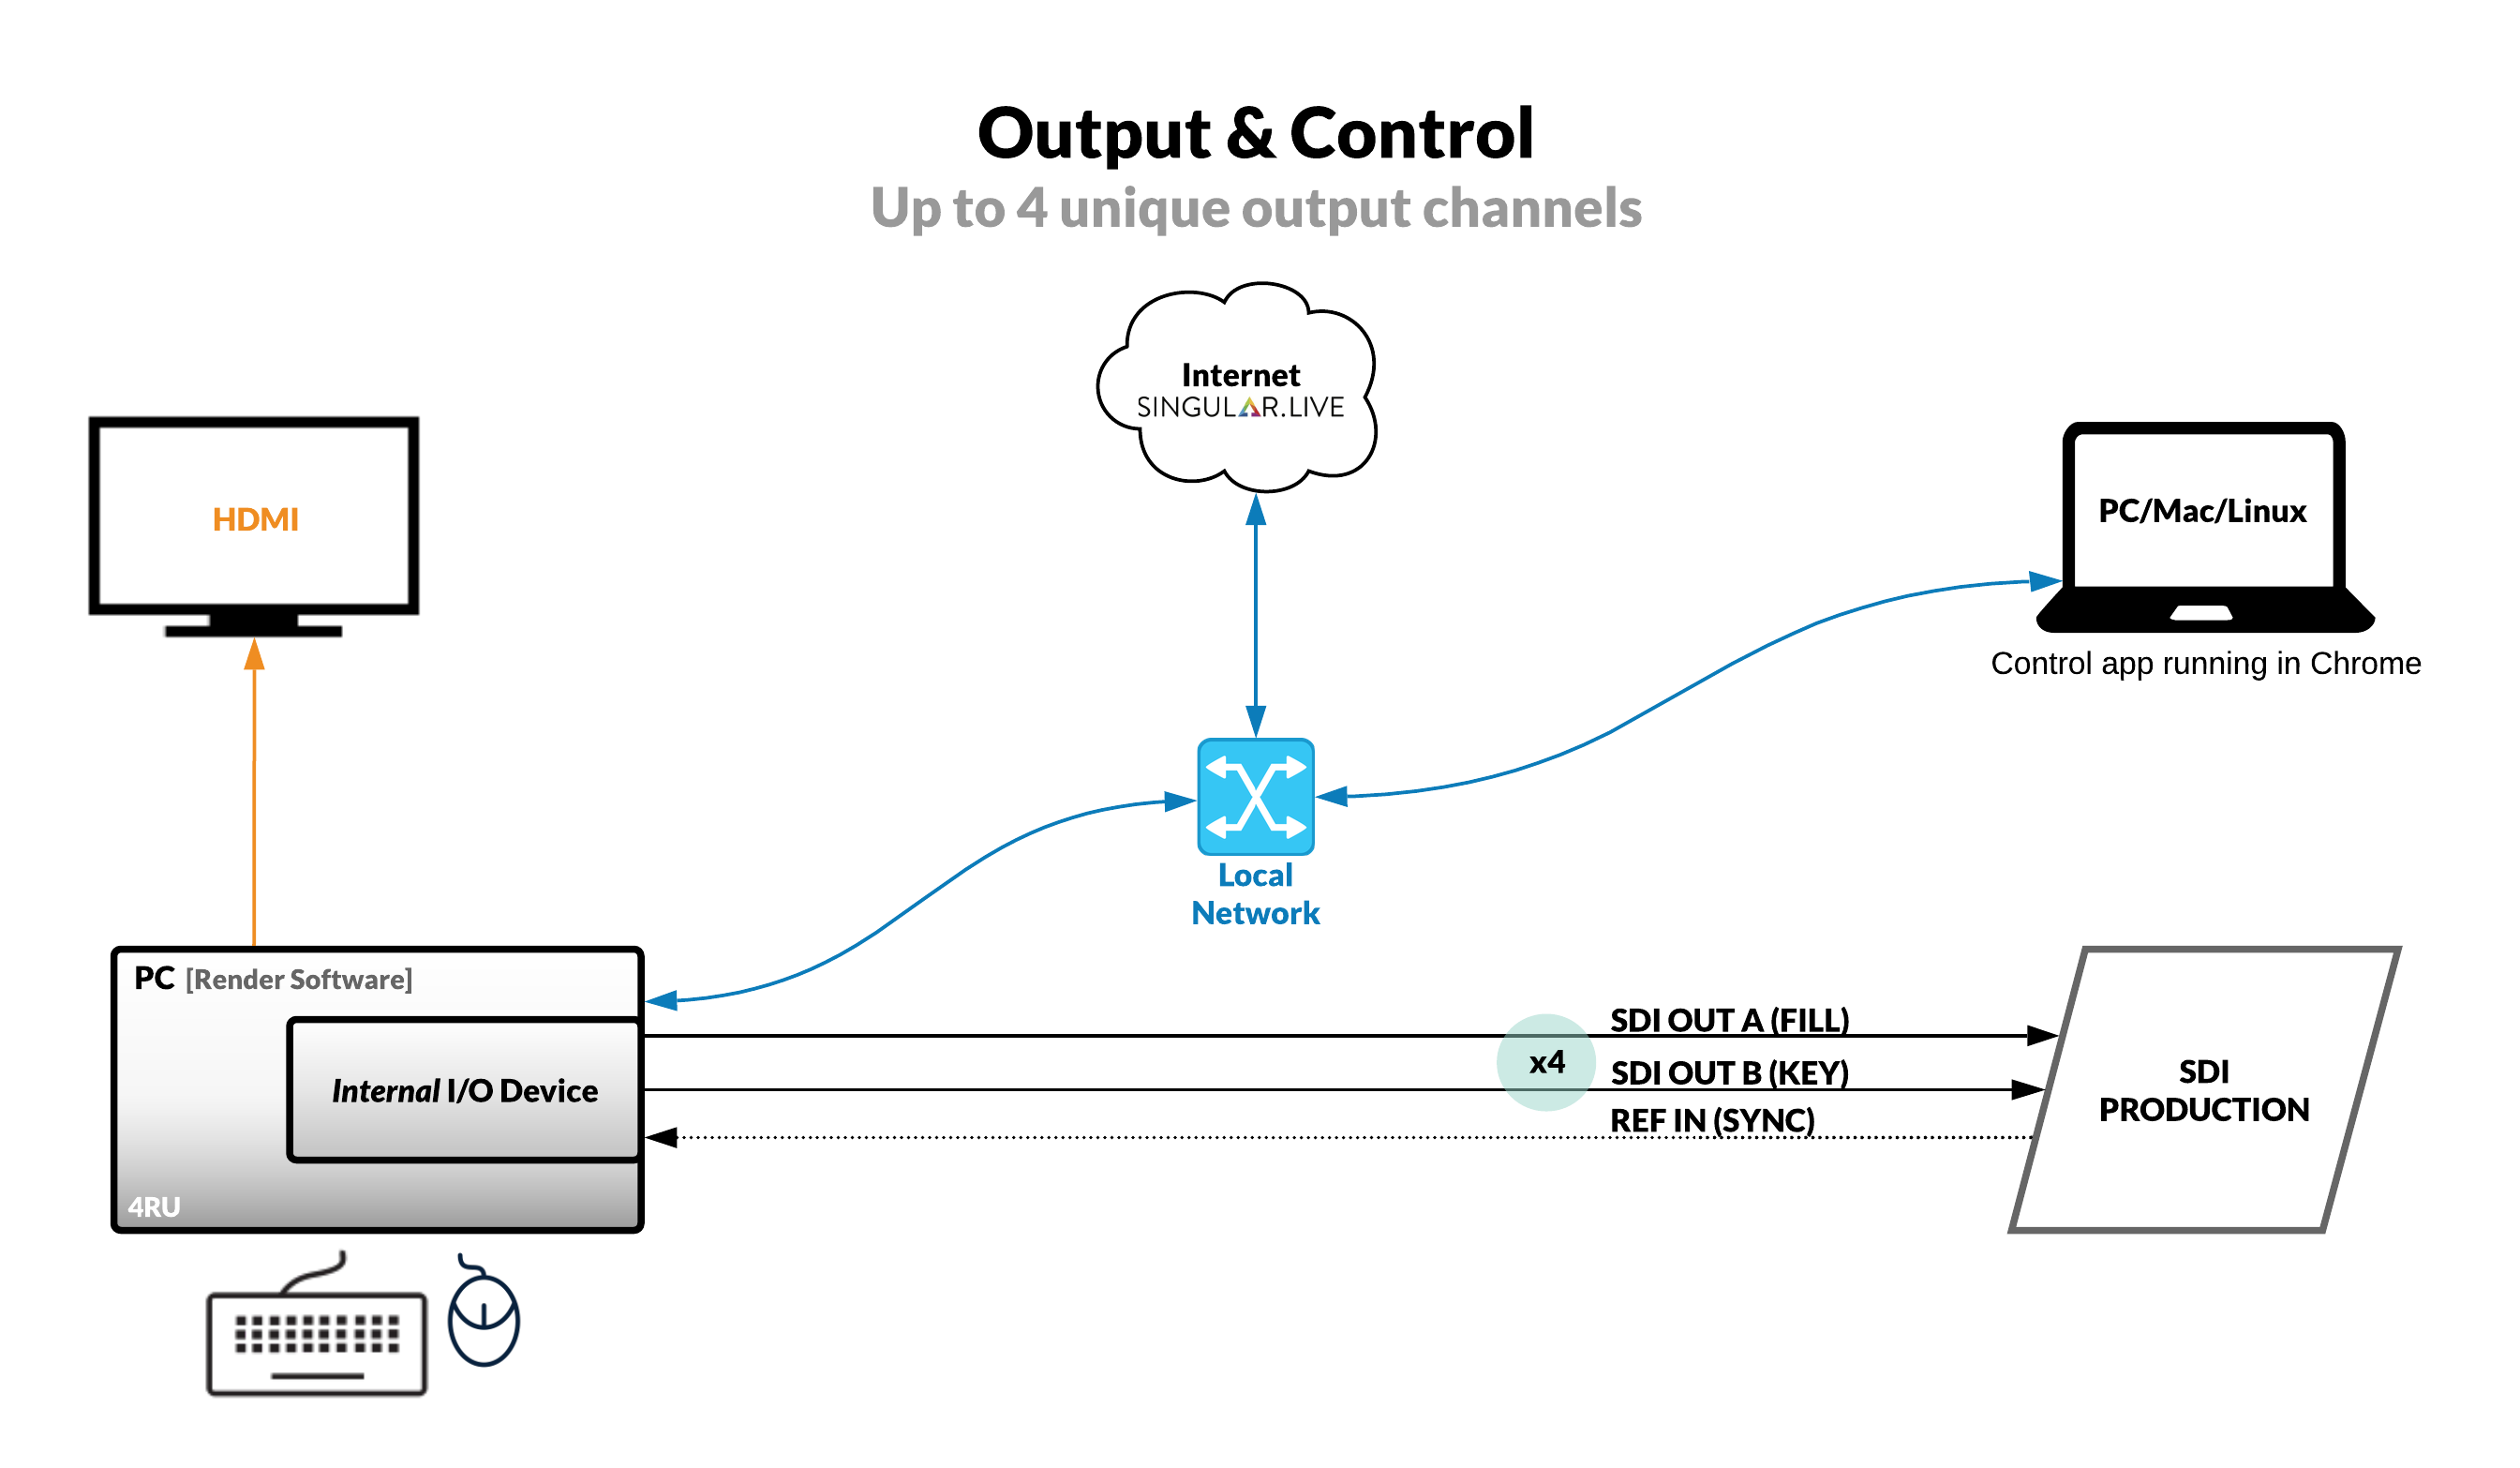
Singular to HD-SDI workflow - Internal I/O Device
Creating a Custom SDI Setup
There are four general steps you will need to take to create your own custom Singular SDI workflow.
Although we provide specific instructions for each step of the workflow, we encourage you to experiment and come up with a workflow that works best you. We cannot be comprehensive for all possible workflows so what is provided below is a few recommended options.
1 - Copy your Output URL
Within your control application, click the Share button and copy your Output URL.
2 - Add your overlays to your encoding software
Use that Output URL to add your overlays to your encoding software. Singular works with a variety of encoding software in two general categories: cloud and desktop. The following are links to tutorials on adding overlays to cloud and encoding software.
A. Adding Singular overlays into Cloud Encoding Software
B. Adding Singular overlays into Desktop Encoding Software
3 - Install & prepare an I/O device
Install an I/O device so that your encoder can output an SDI signal.
Here is a tutorial on getting an SDI Output Using Blackmagic Decklink.
4 - Get HD-SDI output from your encoder
Once your overlays are added to your encoder and an I/O device has been prepared, you will be able to get an HD-SDI output.
Here are a few encoder specific tutorials on getting an SDI output after preparing a Blackmagic Decklink:
You can now output to SDI using OBS. Follow the instructions below to connect OBS to your SDI output.
1 – Select the Decklink Output option in Tools - Within OBS, open the Tools dropdown menu, then select Decklink Output.
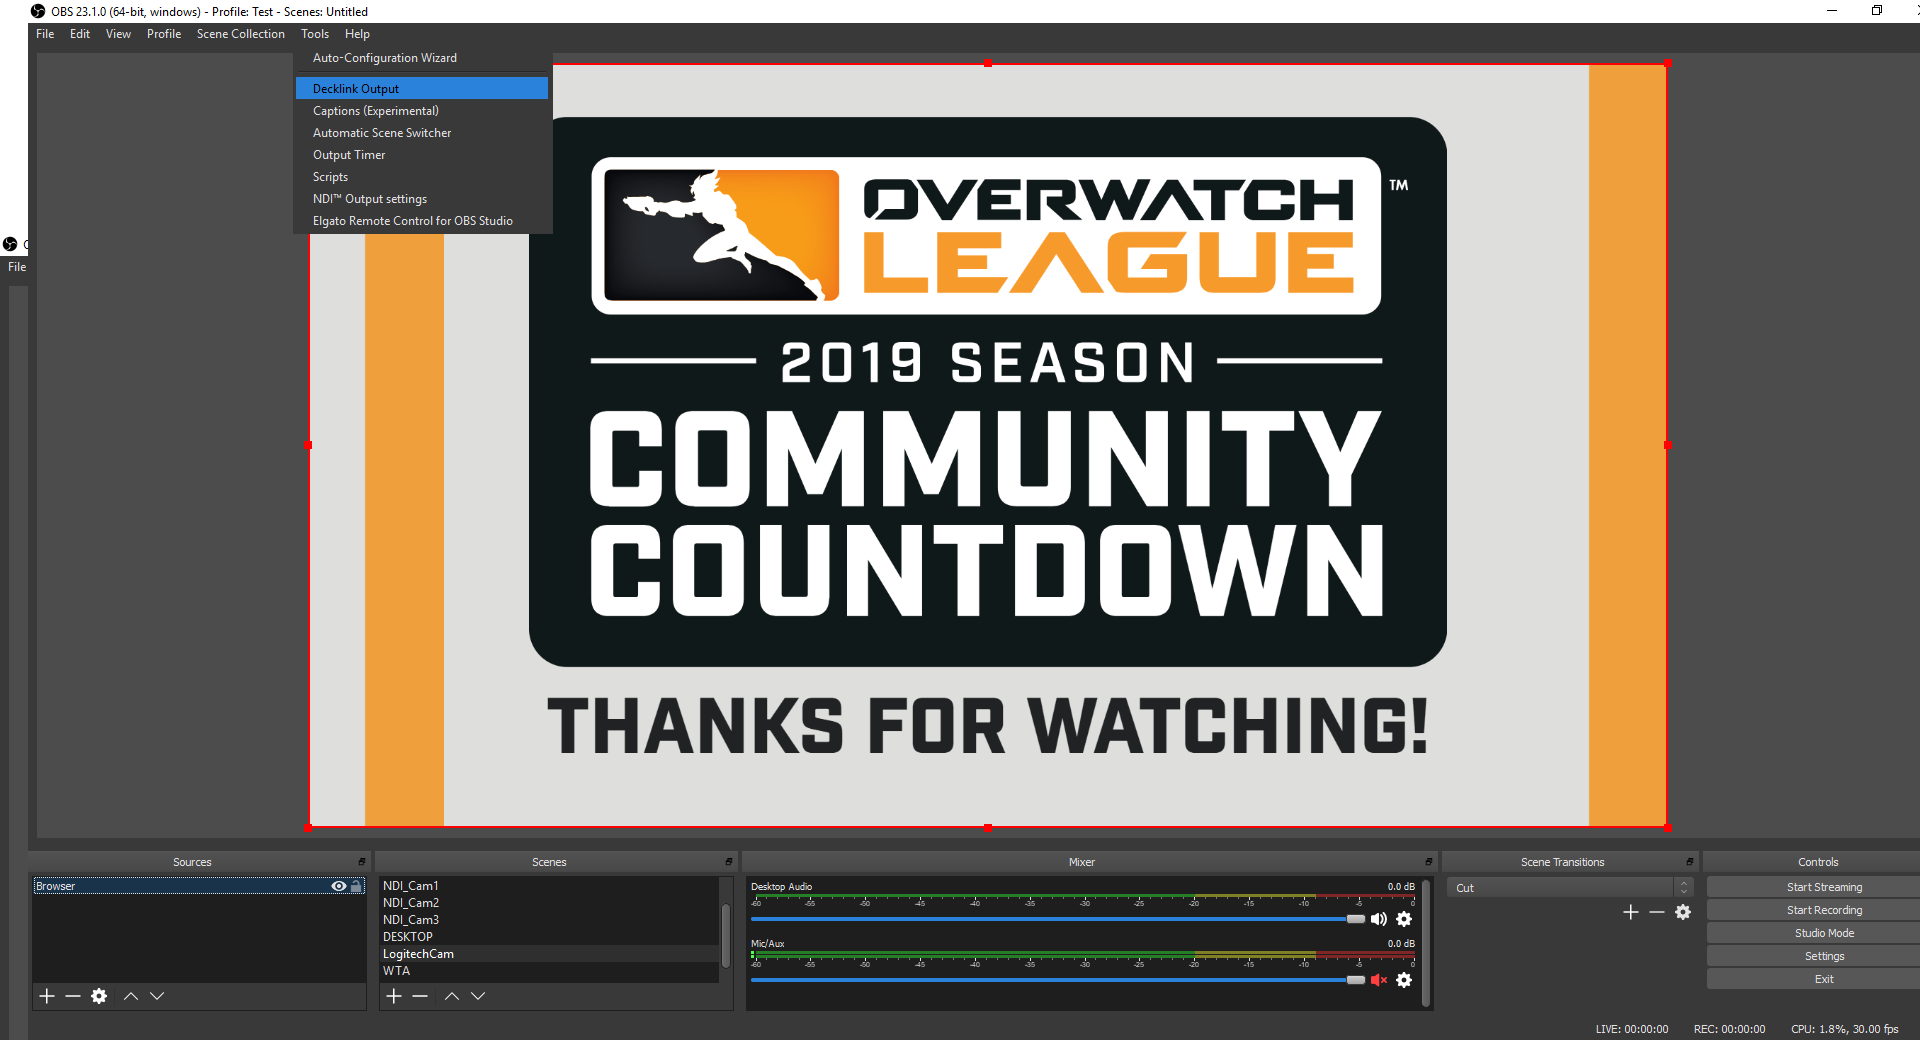
Opening the Decklink Output option
2 – Select Device - Choose the device you wish to use (ex. Decklink Quad (1) ).
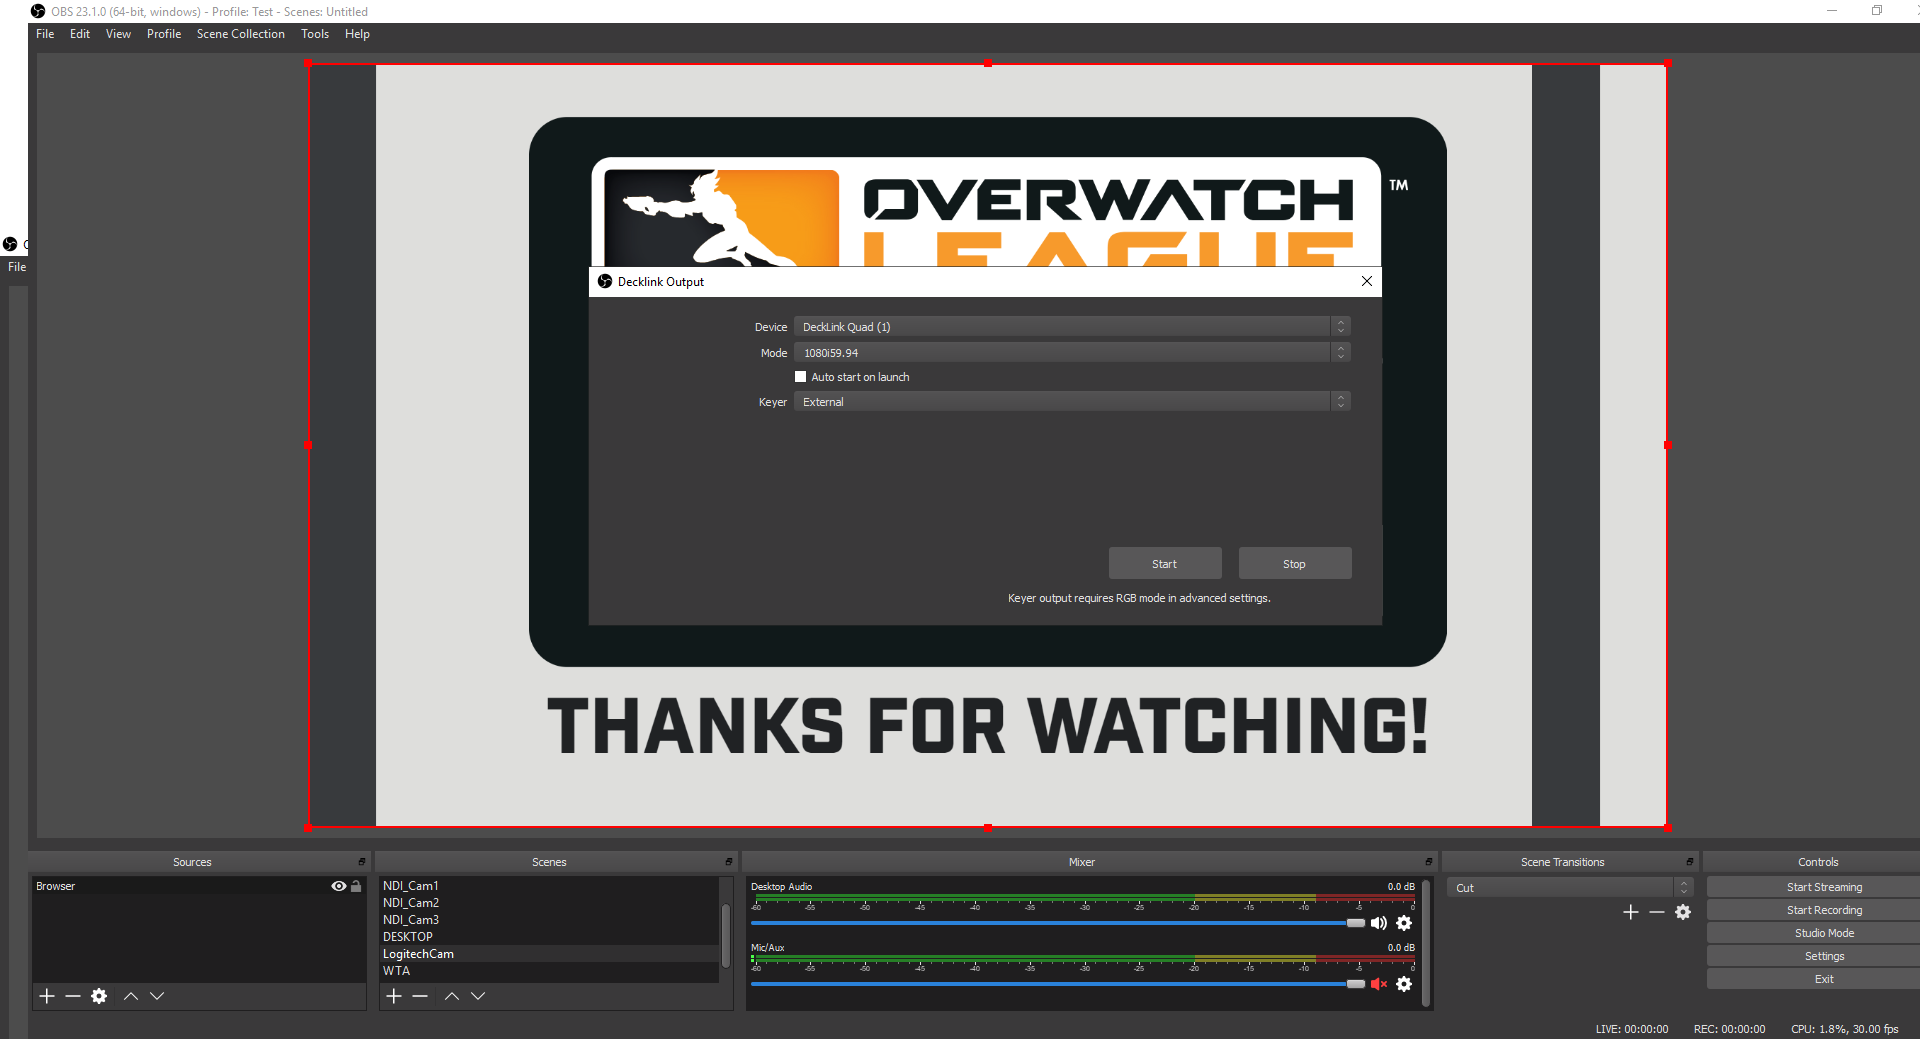
Select a device, mode, and keyer
3 – Select Mode - Choose which mode to use (ex. 1080i59.94).
4 – Select Keyer - Select a keyer to use (ex. External).
5 – Press Start - Click the Start button and you should be able to see your output.
Once you have the proper hardware setup, outputting your Singular overlays with HD-SDI using Wirecast is simple.
1 - Add your Singular overlays to Wirecast - Use your Output URL to add your overlays to Wirecast. Read how to add them here.
2 - Select your output - (1) Open the Output menu from the top toolbar and (2) select your output channel. Then, (3) select your output resolution and (4) click "Start Output" to enable the output channel.
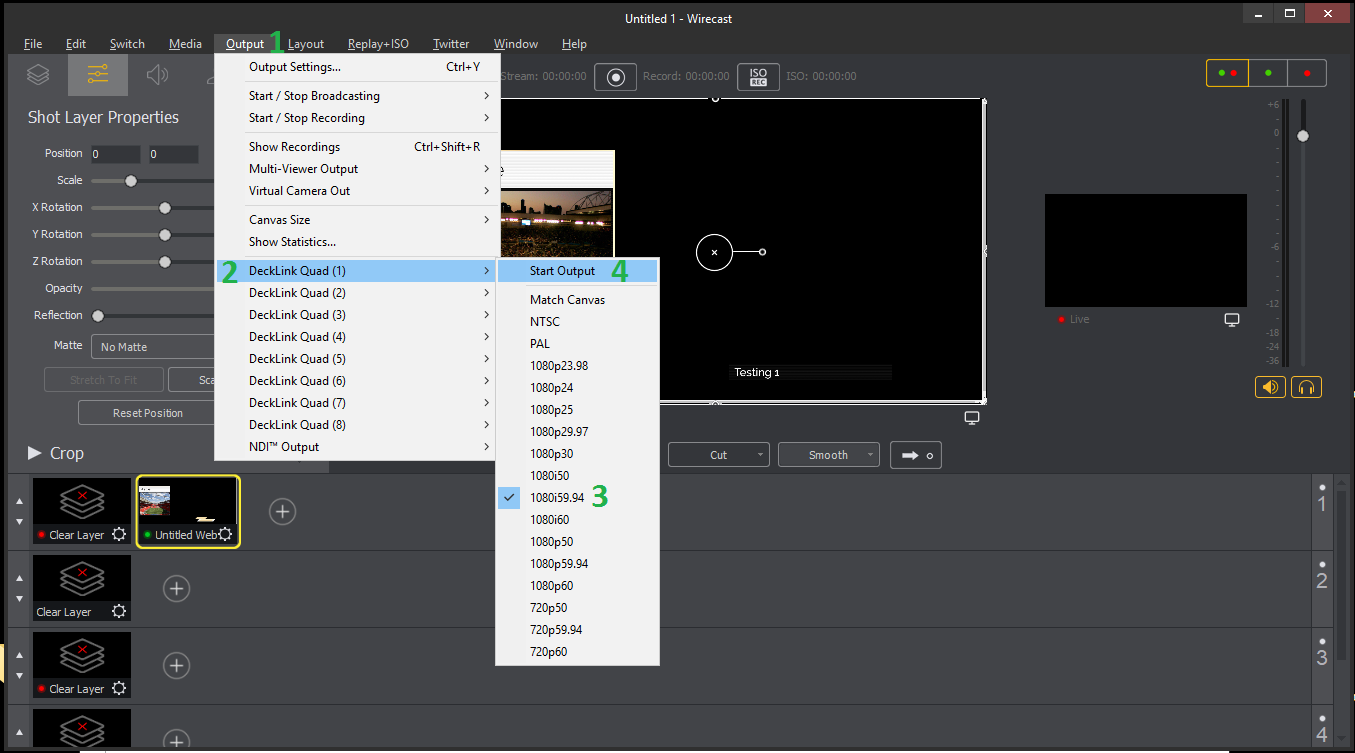
The Output Menu
3 - Send the SDI signal - (1) Press the Go button to send your Singular overlays to your output channel using SDI.
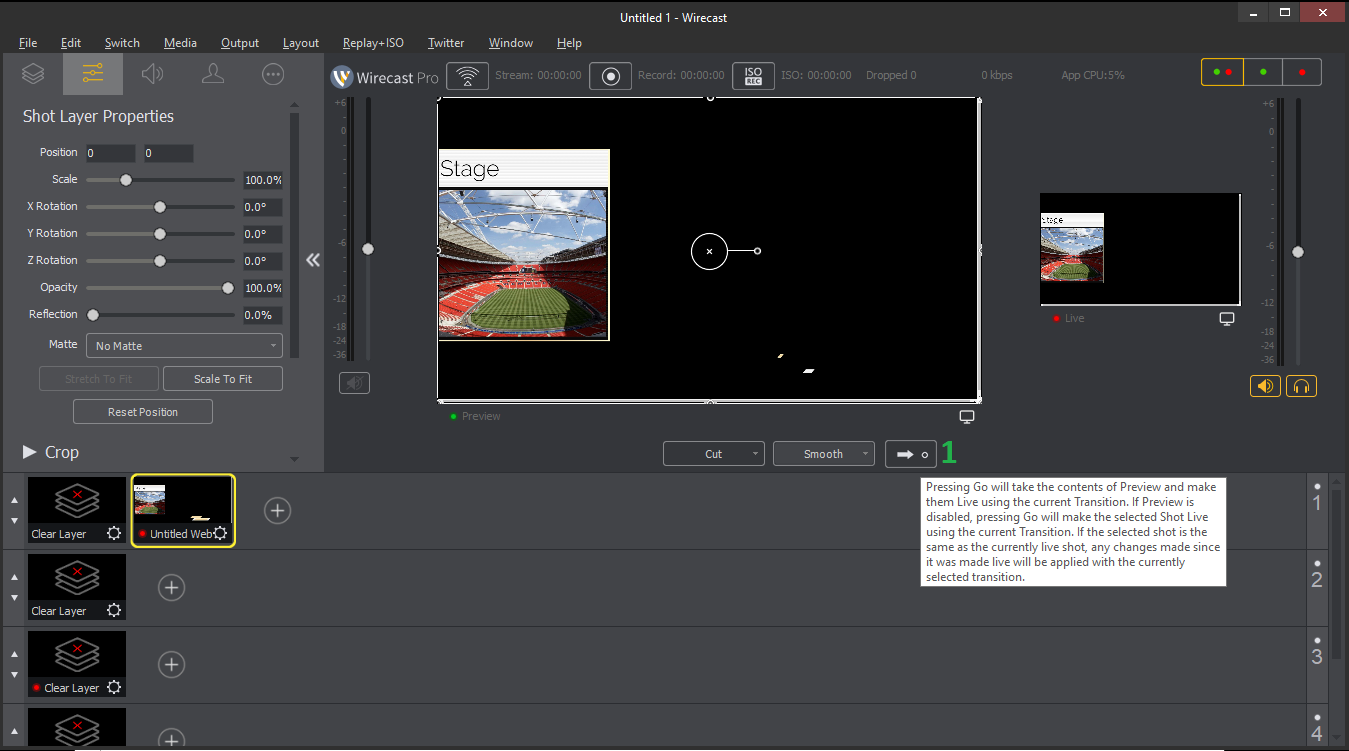
Press the Go button to send your overlays to air
Vmix is one of the more popular pay-for streaming applications (encoder), and there are many reasons to pay for it! Check out all the goodies here on the Vmix website.
In this article, we are going to go over adding your Singular layer in an HD-SDI setup in which Vmix is generating a Key and Fill signal for you graphics layer.
NOTE: This installation is compatible with a Blackmagic, Decklink Quad 2 card. For card recommendations check out the vMix "Supported Hardware" page.
Installation
1 - Download vMix - Download vMix onto your computer which can be found here.
-
If you are new to vMix there are great resources for learning how to install and set up your application. For installation and getting started, try their resources page here for helpful tutorial videos.
Configuring Output Settings
2 - Configure Output Setting - This is done by clicking on the Setting icon next to External and selecting “External Output Setting”
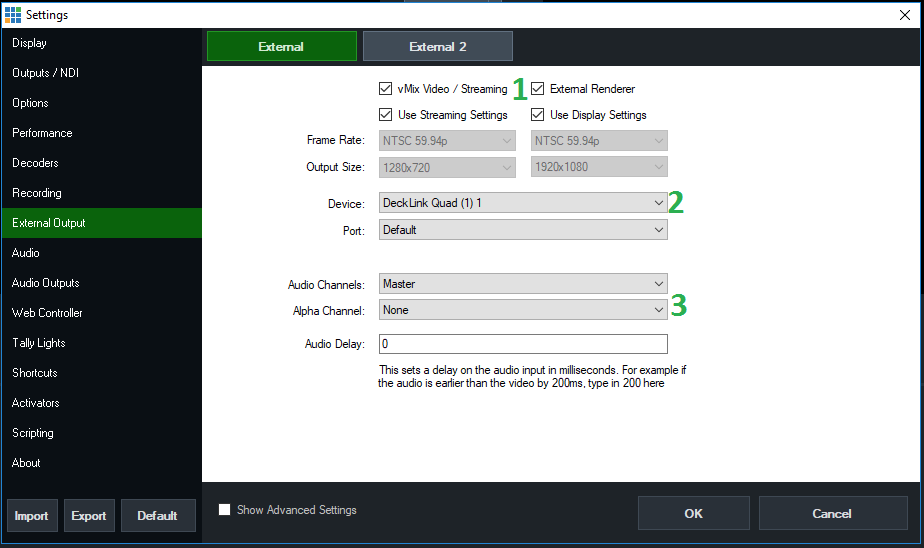
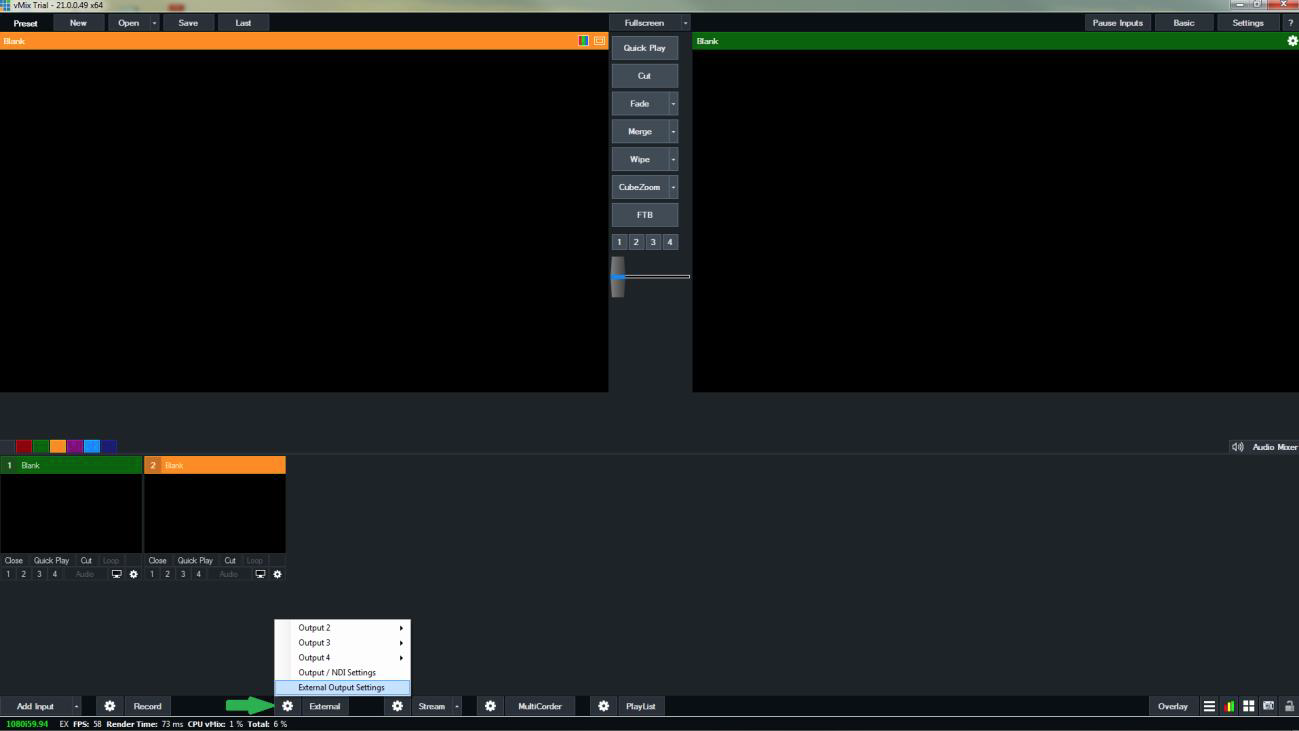 *Note: It will launch this window that will default to the External tab. This will be your main program output where you will select which Channel on the Blackmagic Decklink Quad 2 card will be your output.
3 - Select External Renderer - Check the box of “External Renderer”
4 - Select Device - Select the device you want to use which in our case will be Decklink Quad and you will want SDI 1 so the selection will be “DeckLink Quad (1) 1”
5 - Set Alpha Channel - The Alpha Channel can be set to None, Premultiplied or Straight. In this case we will choose “None”
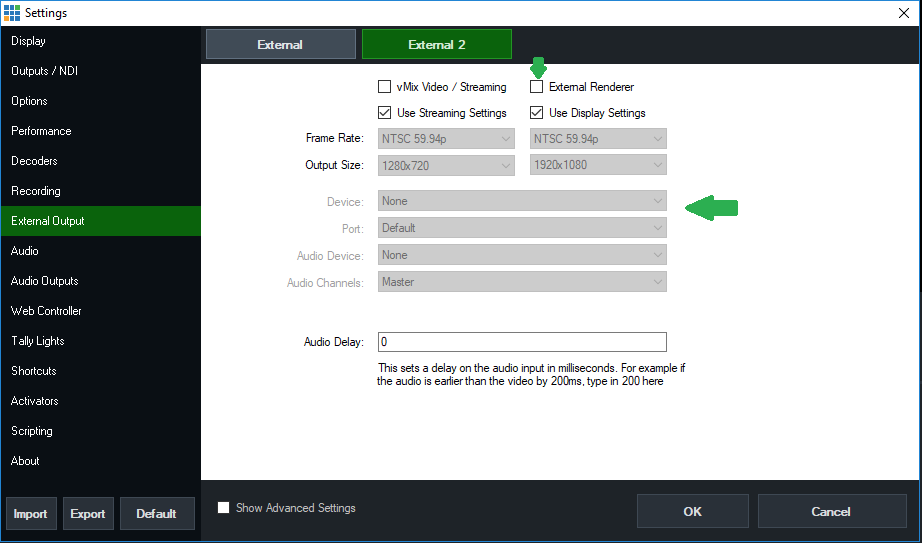
*Note: In our test case, we are only testing out 1 Fill and 1 Key so you will need to navigate to External 2 tab to disable it.
6 - Disable External Renderer - Make sure that the External Renderer box is unchecked and all the other fields are grayed out to show that External 2 have been disabled.
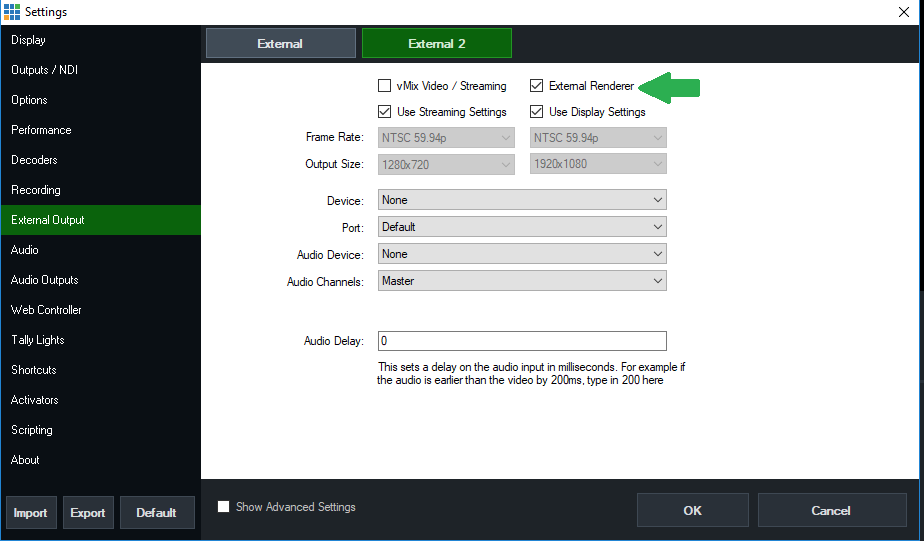
*Note: If you forgot to uncheck the External Render on External 2, you will see this message when pressing the External Button
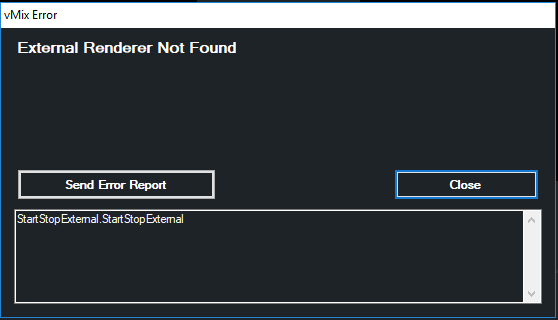
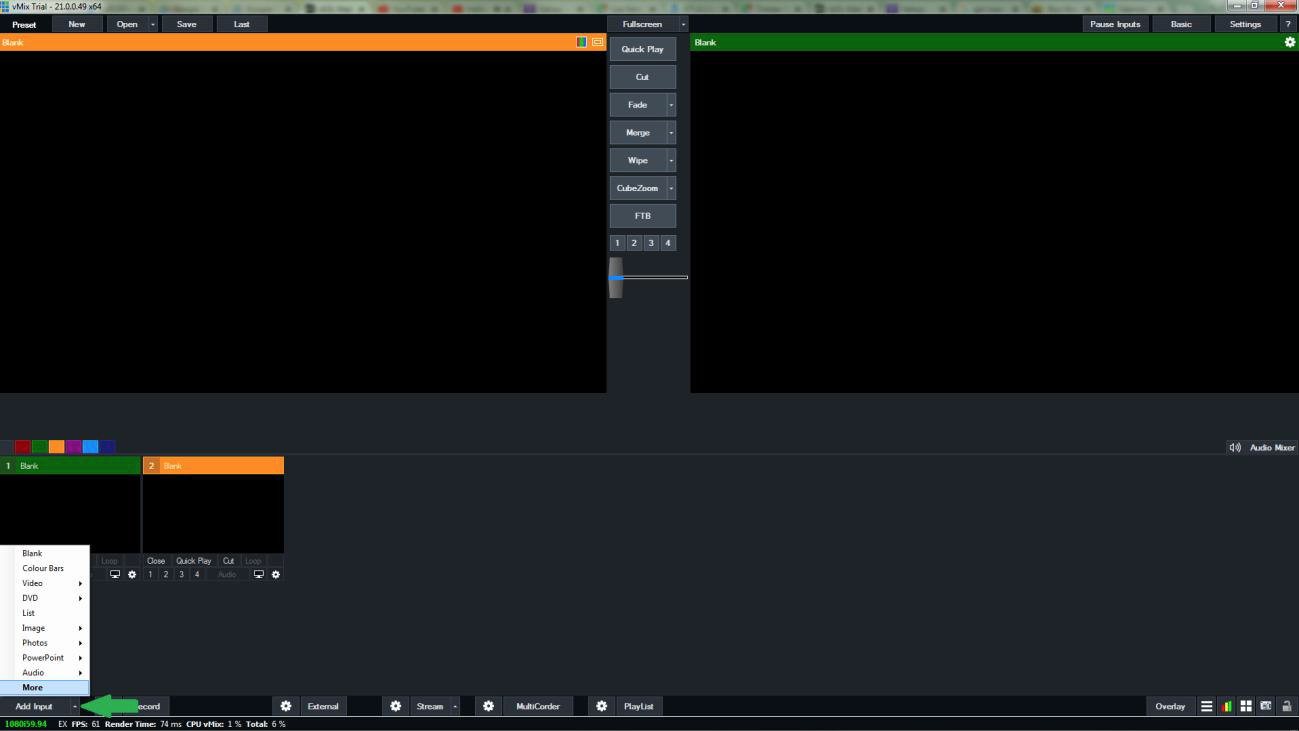
*Note: If you want to add a Singular link to vMix, you will need to press on the up arrow next to Add Input to get a selection list where you will select “More”
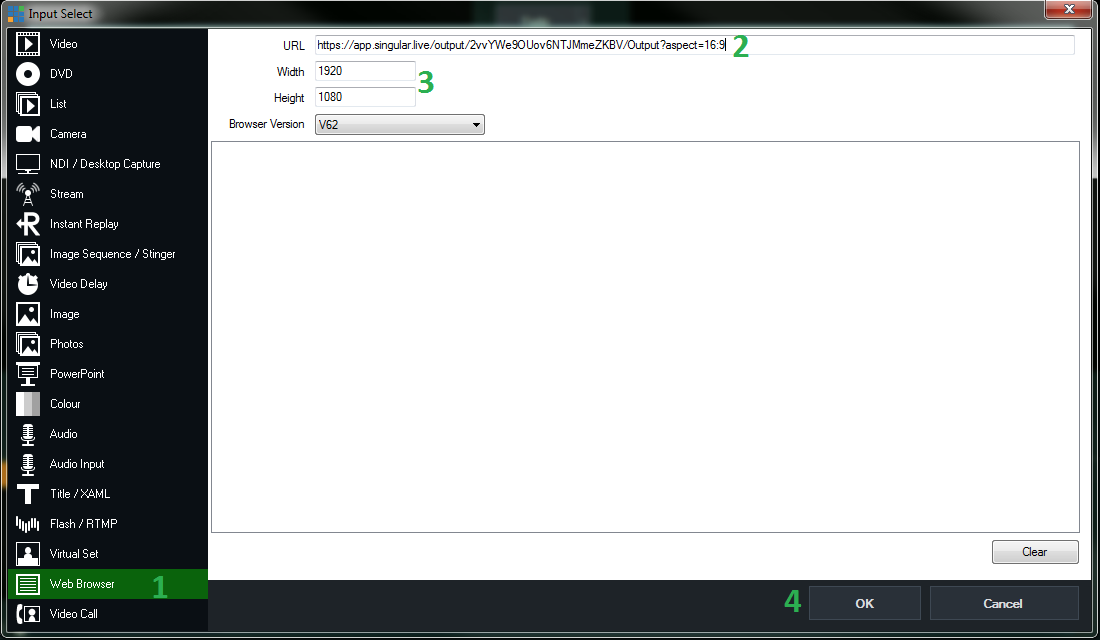
You will then get this window:
1. Select “Web Browser”
2. Paste in your Singular link in the URL tab field
3. You can edit your width and height or leave it at the default
4. Press “OK”
You will then see the Singular input in vMix which will automatically be added to your program output.
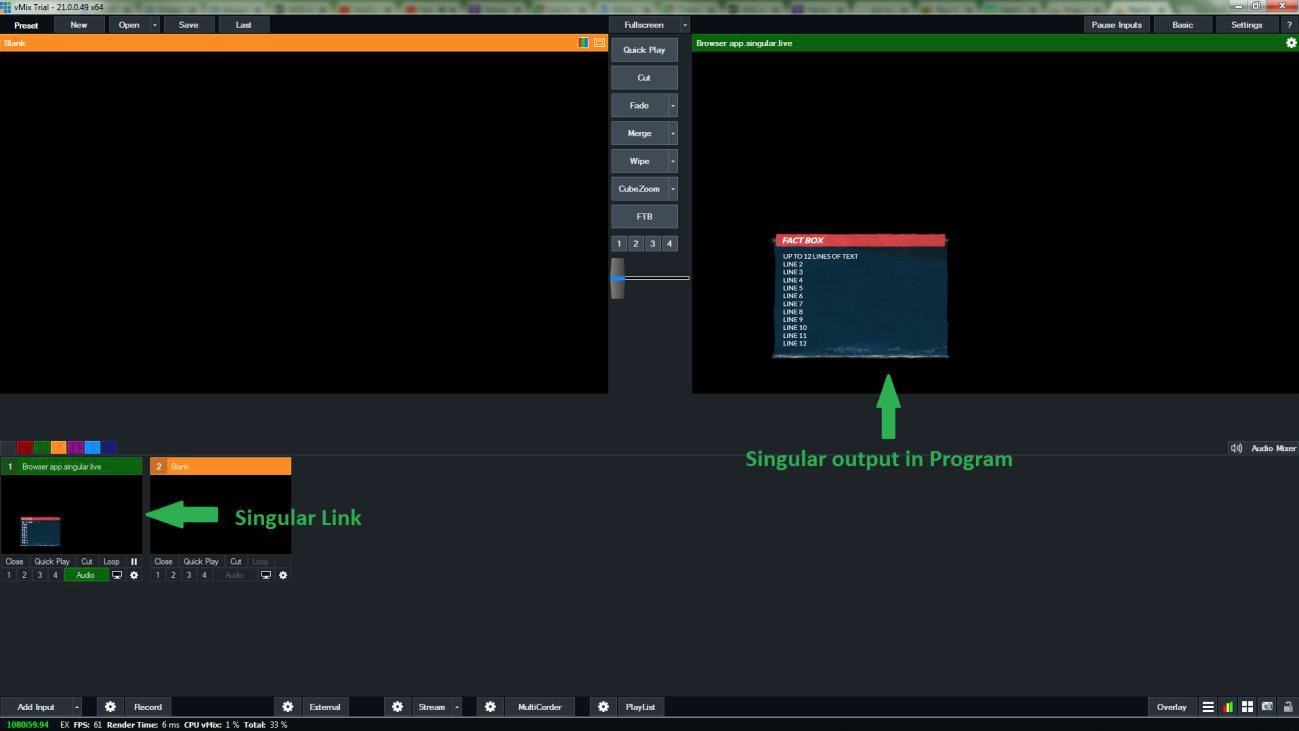
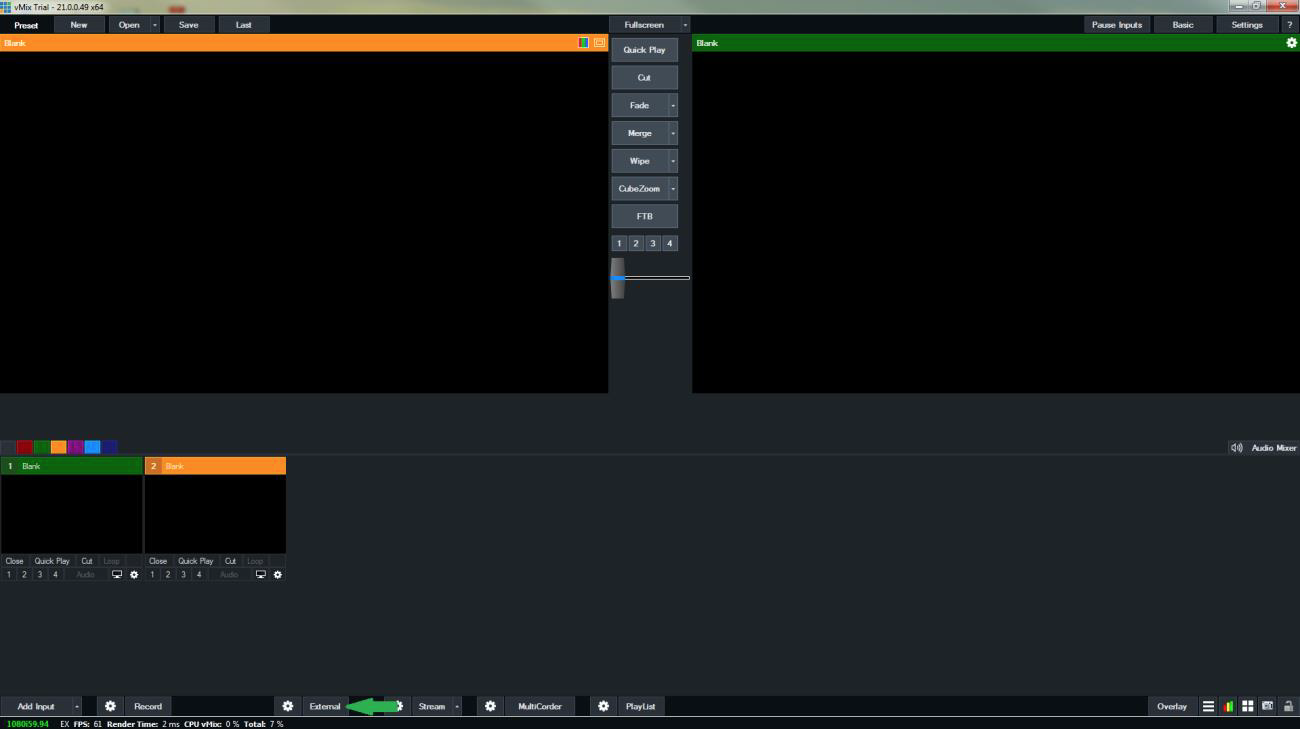
7 - Select External - The final step is to press the External button
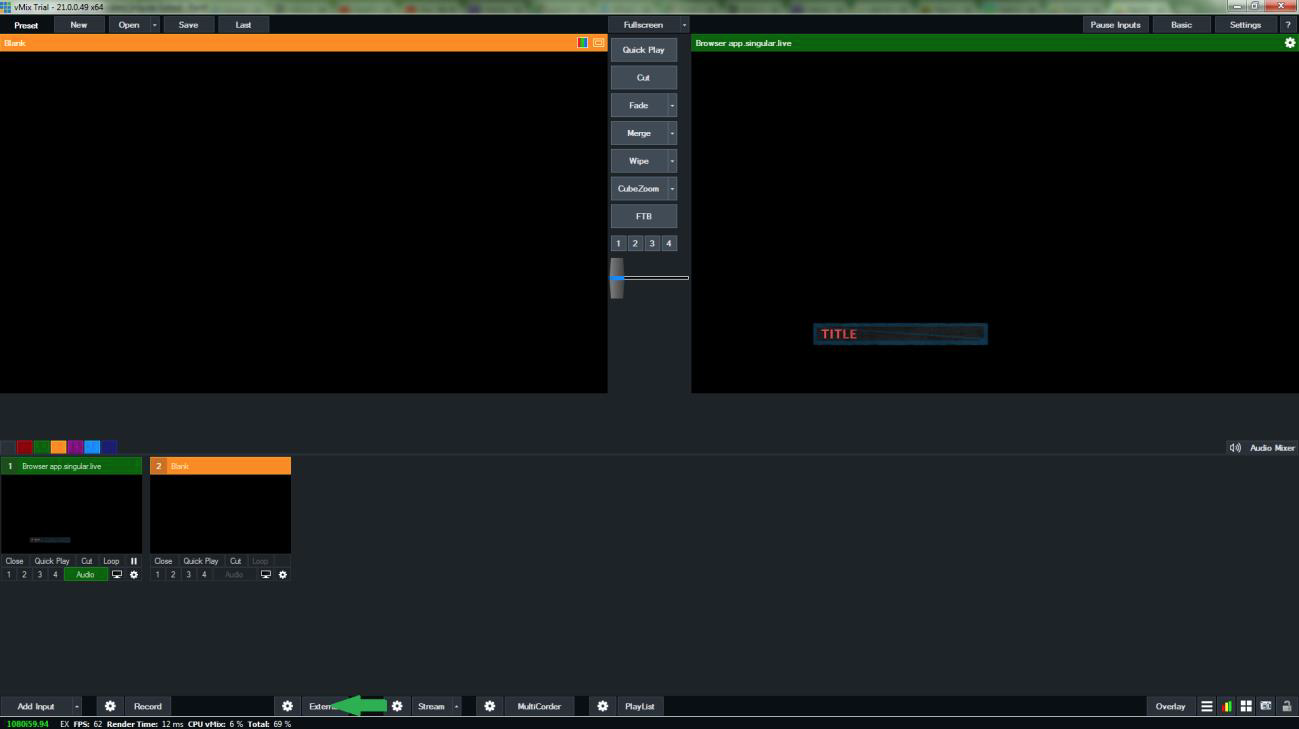
*Note: After this, if the External button turned RED with no errors, it should be outputting on your monitor.
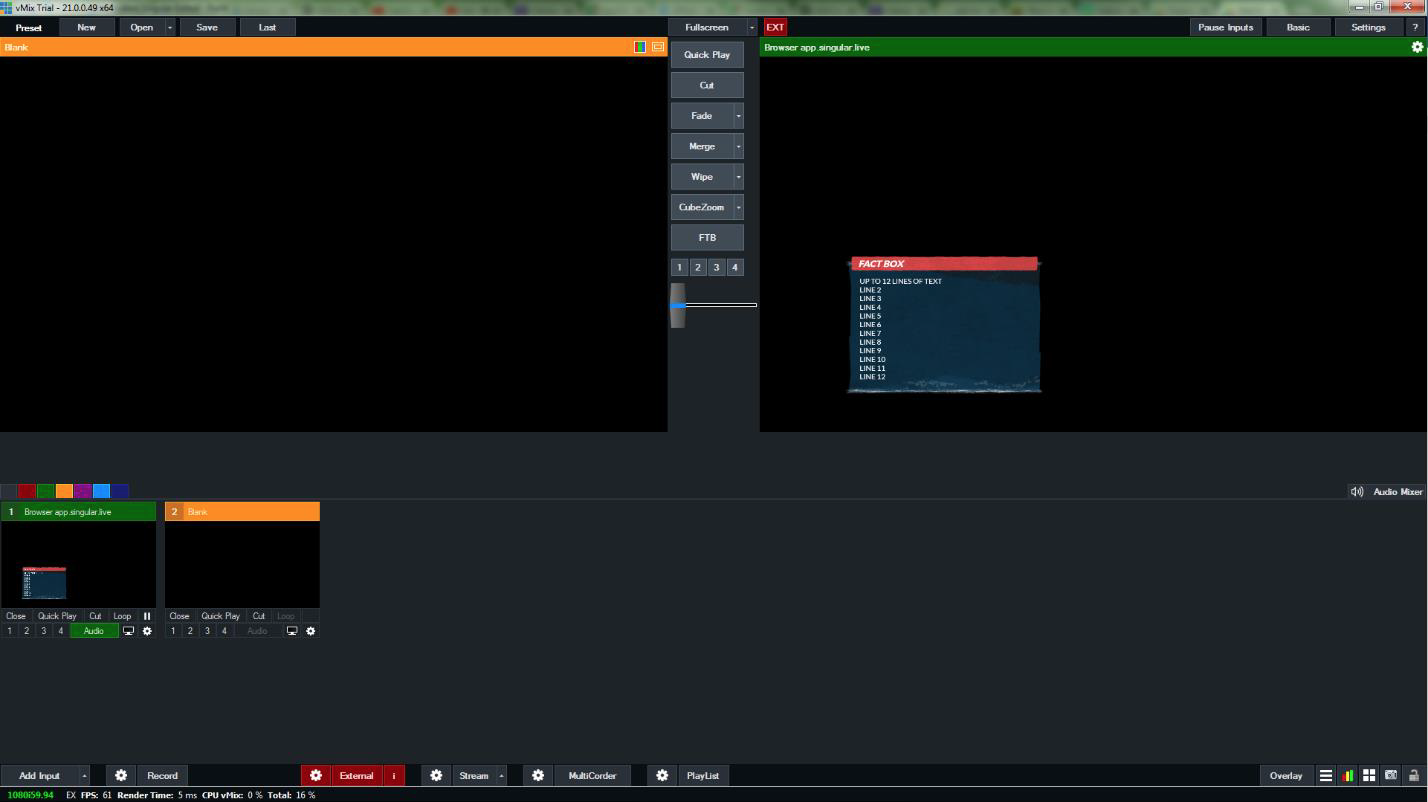
Yes! It is possible to translate a web source to an HD SDI output. With this setup, you can get a traditional Key and Fill channel for your Singular.live web layer.
CasparCG is a free and open source software that supports real-time playout of mixed live and recorded audio/video input. It requires 2 software; the client and server to work build and process the graphics.
NOTES:
- The Caspar CG Setup is only available for Windows and Linux users
- You'll need a video card like a Blackmagic Decklink Quad 2, with a recommended configuration
1 - Download the server and client software – For the server, go to http://builds.casparcg.com/
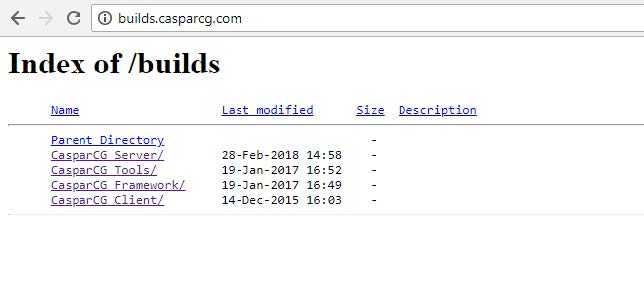
2 - The server installer will be in CasparCG Server -> master. You will want to use version d442a8f84f68838f91c82f5f57c9634e84f7a23a released on 6-10-2019 (screenshot below is for example purposes only)
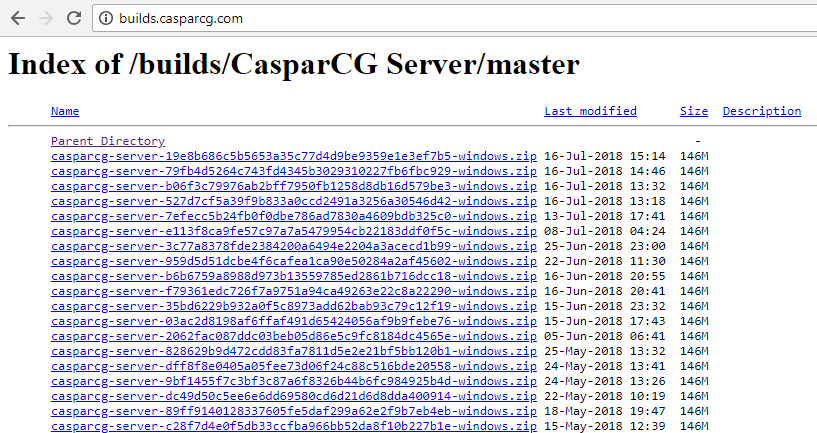
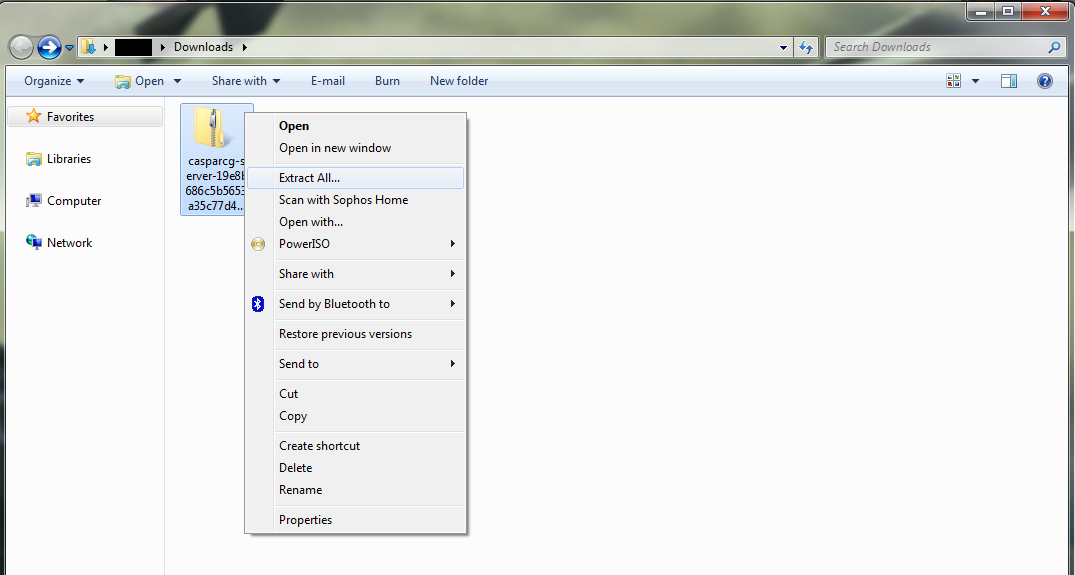
3 - When the file finishes downloading, it will be in your default Download folder. You will need to extract the file.
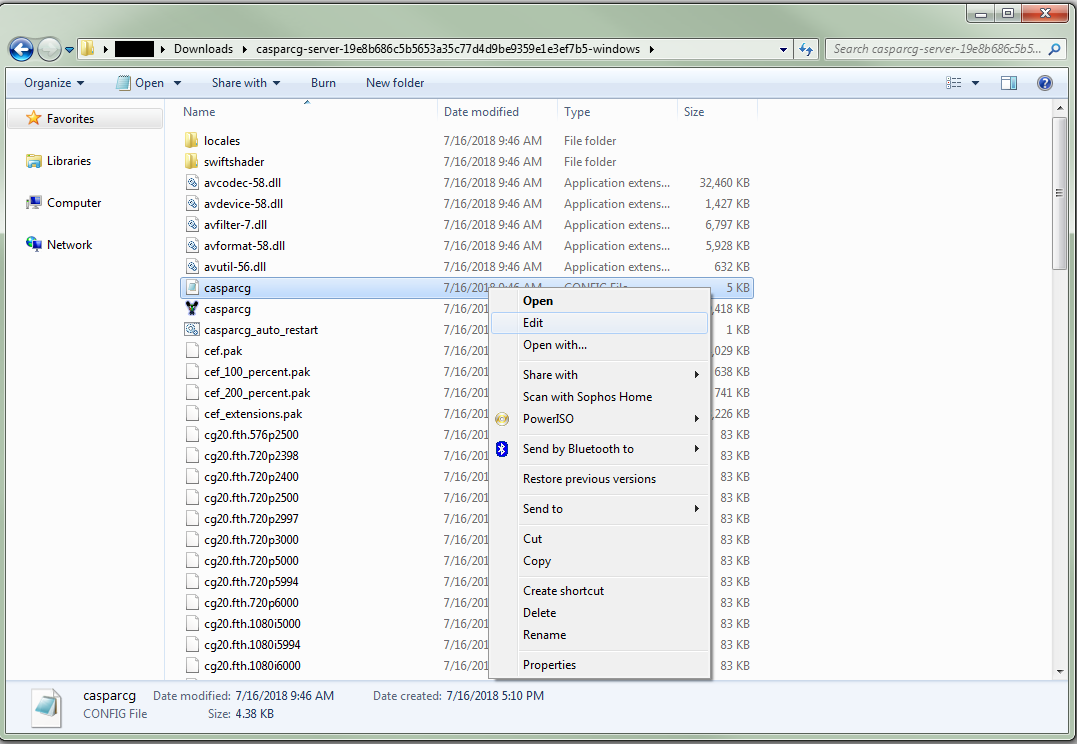
4 - After the file finish extracting, you will need to edit the CasparCG config file to enable your Blackmagic Decklink Quad 2 card. Right click on the casparcg config file and select Edit.
-
This how the config file will look before any modification
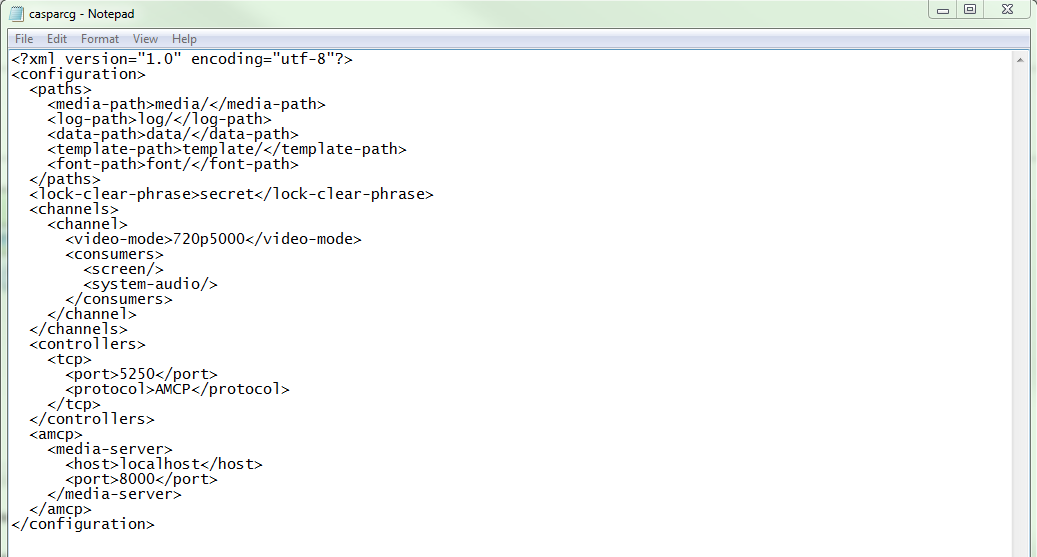
5 - To enable the Blackmagic Decklink Quad 2 card, you will need to add this line into the config.
*This is just for 1 output with Fill and Key
<channel>
<video-mode>1080i5994</video-mode>
<consumers>
<decklink>
<device>1</device>
<key-device>device + 1</key-device>
<embedded-audio>true</embedded-audio>
<latency>default</latency>
<keyer>external</keyer>
<key-only>false</key-only>
<buffer-depth>4</buffer-depth>
</decklink>
</consumers>
</channel>
- It will look like this in the config file.
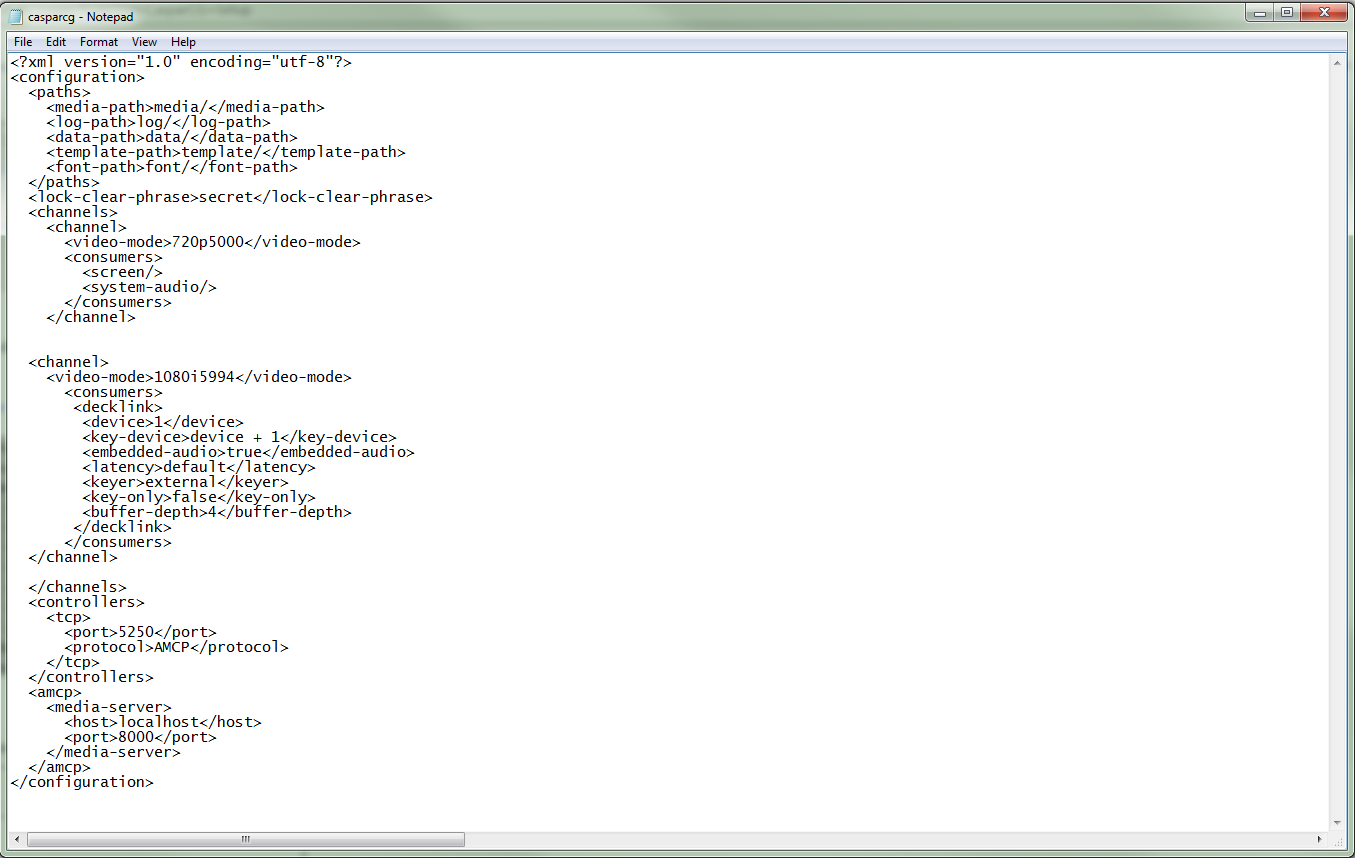
*To enable Output 2, 3 and 4 you will need to add these lines of code into the config file.
<channel>
<video-mode>1080i5994</video-mode>
<consumers>
<decklink>
<device>2</device>
<key-device>device + 1</key-device>
<embedded-audio>true</embedded-audio>
<latency>default</latency>
<keyer>external</keyer>
<key-only>false</key-only>
<buffer-depth>4</buffer-depth>
</decklink>
</consumers>
</channel>
<channel>
<video-mode>1080i5994</video-mode>
<consumers>
<decklink>
<device>3</device>
<key-device>device + 1</key-device>
<embedded-audio>true</embedded-audio>
<latency>default</latency>
<keyer>external</keyer>
<key-only>false</key-only>
<buffer-depth>4</buffer-depth>
</decklink>
</consumers>
</channel>
<channel>
<video-mode>1080i5994</video-mode>
<consumers>
<decklink>
<device>4</device>
<key-device>device + 1</key-device>
<embedded-audio>true</embedded-audio>
<latency>default</latency>
<keyer>external</keyer>
<key-only>false</key-only>
<buffer-depth>4</buffer-depth>
</decklink>
</consumers>
</channel>
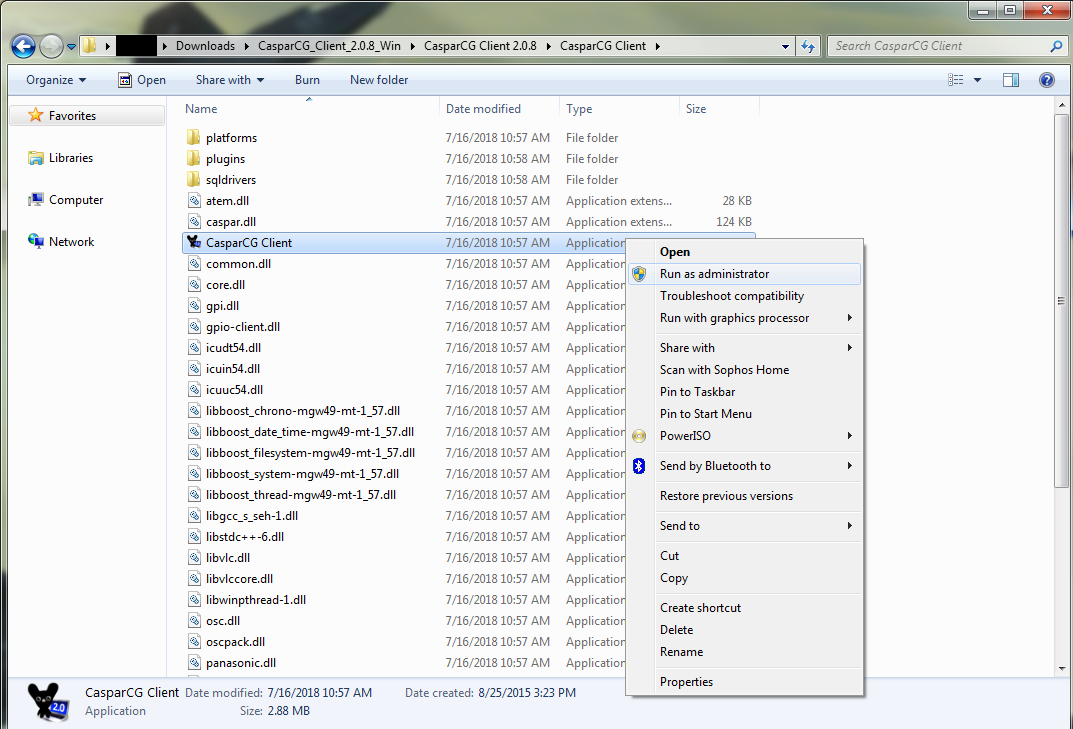
6 - After you finish editing the config file and saving your changes. You can now launch the CasparCG Server application by right clicking on the file and select “Run as Administrator”
-
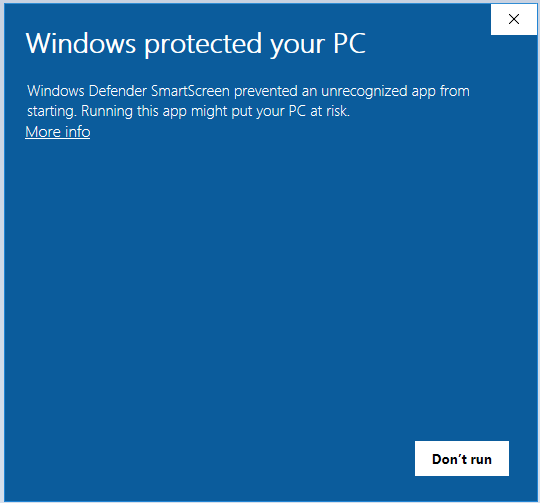
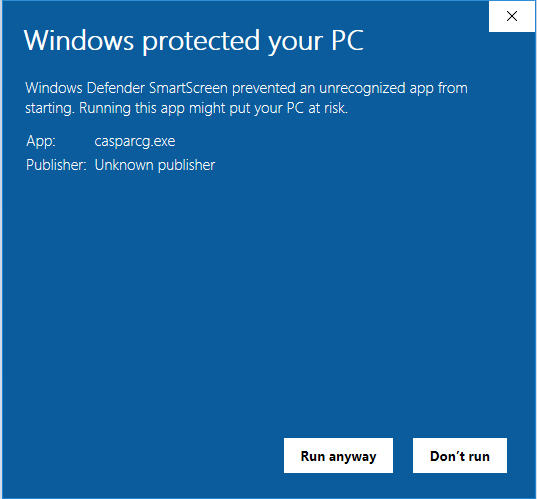
If you are on Windows 10 Operating Systems, you might see this screen. Just select More Info and then Run anyway
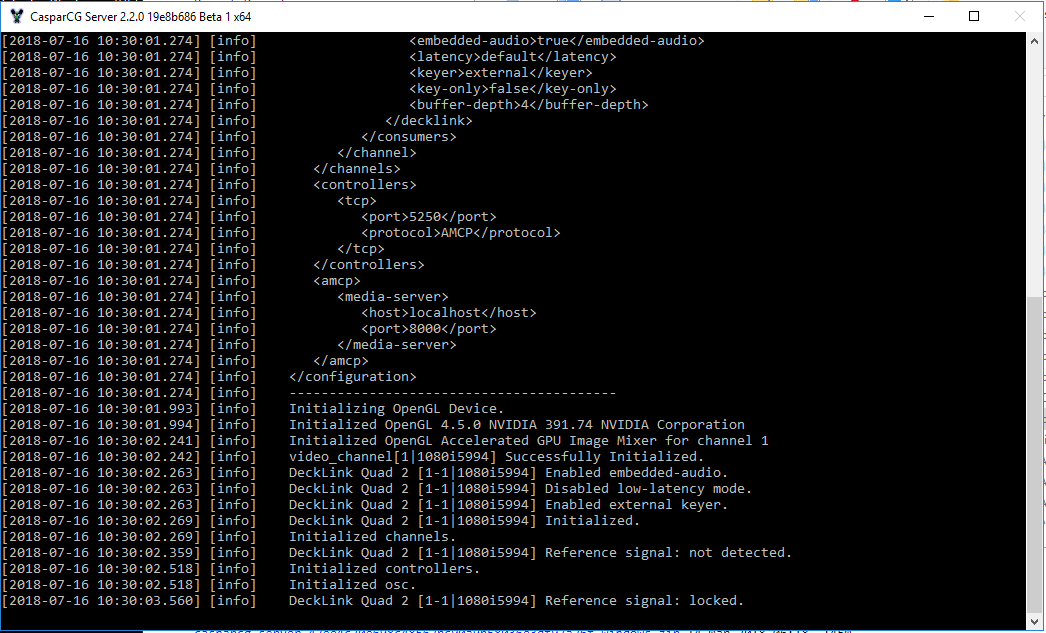
7 - When the application launches, it will initialize all the proper config and it will verify if the Blackmagic Decklink Quad 2 settings that we added loaded properly. If you see this screen then it did.
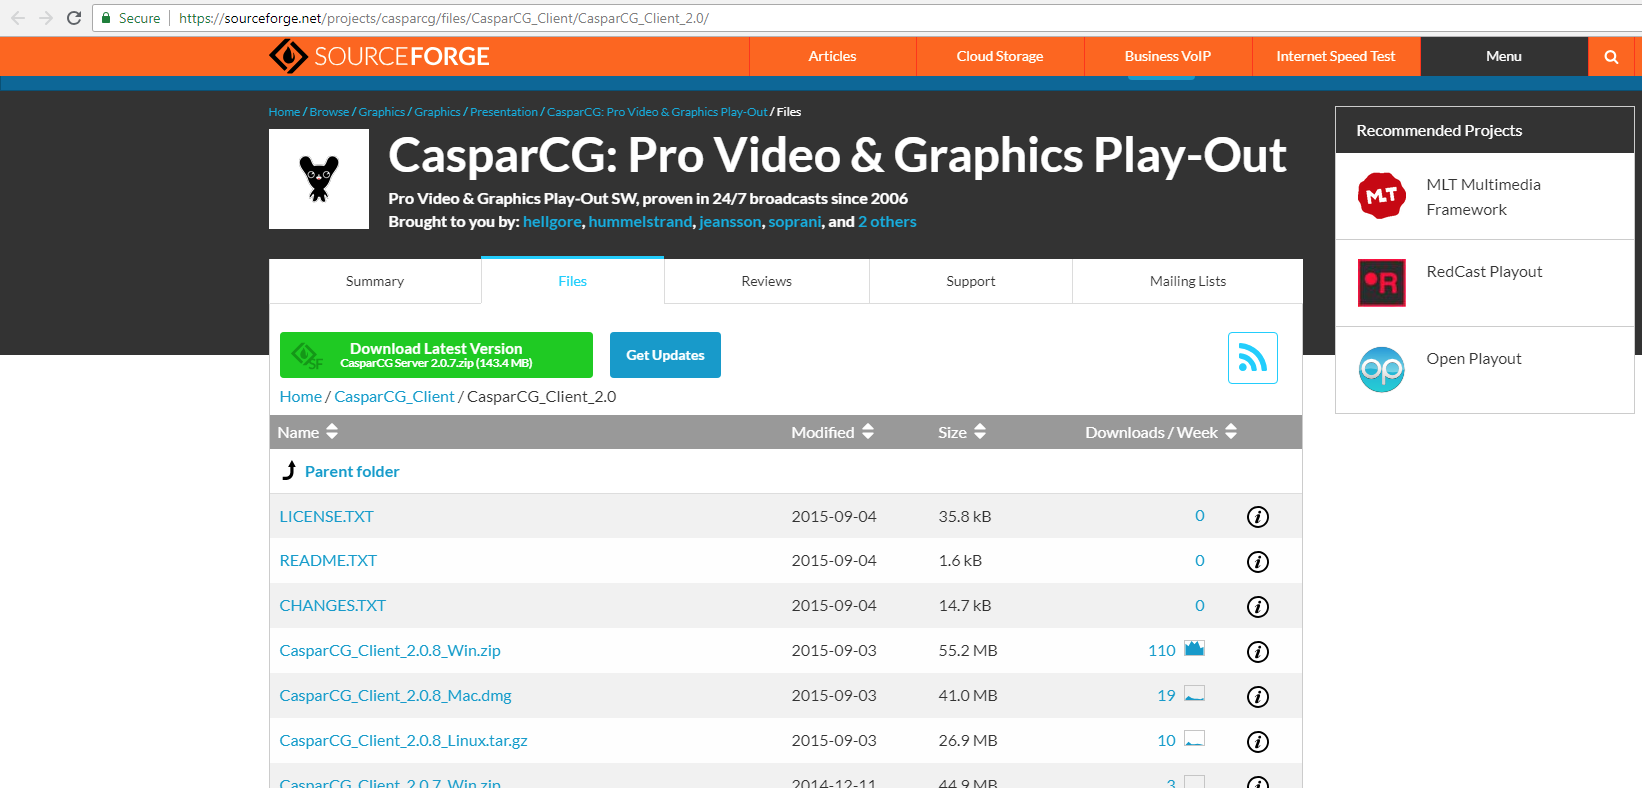
8 - To download the client version, you will need to go to https://sourceforge.net/projects/casparcg/files/CasparCG_Client/CasparCG_Client_2.0/
- Download the 2.0.8 version
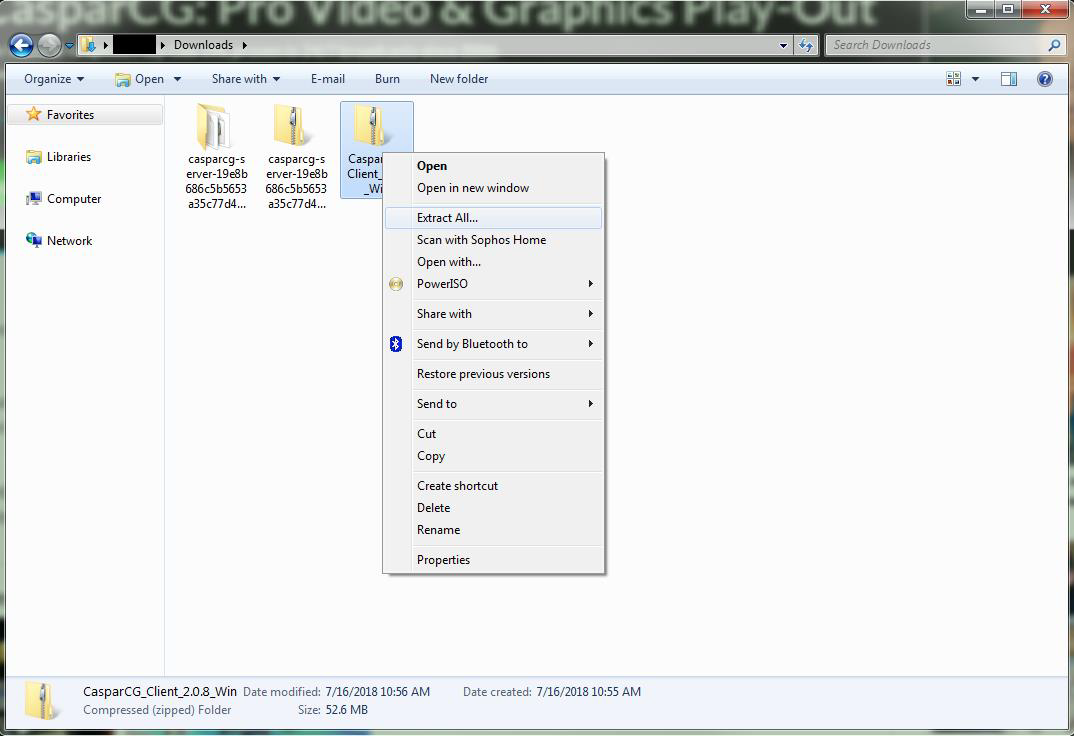
9 - The downloaded file will be in your default Download folder. You will need to extract the file just like you did for the Server file.
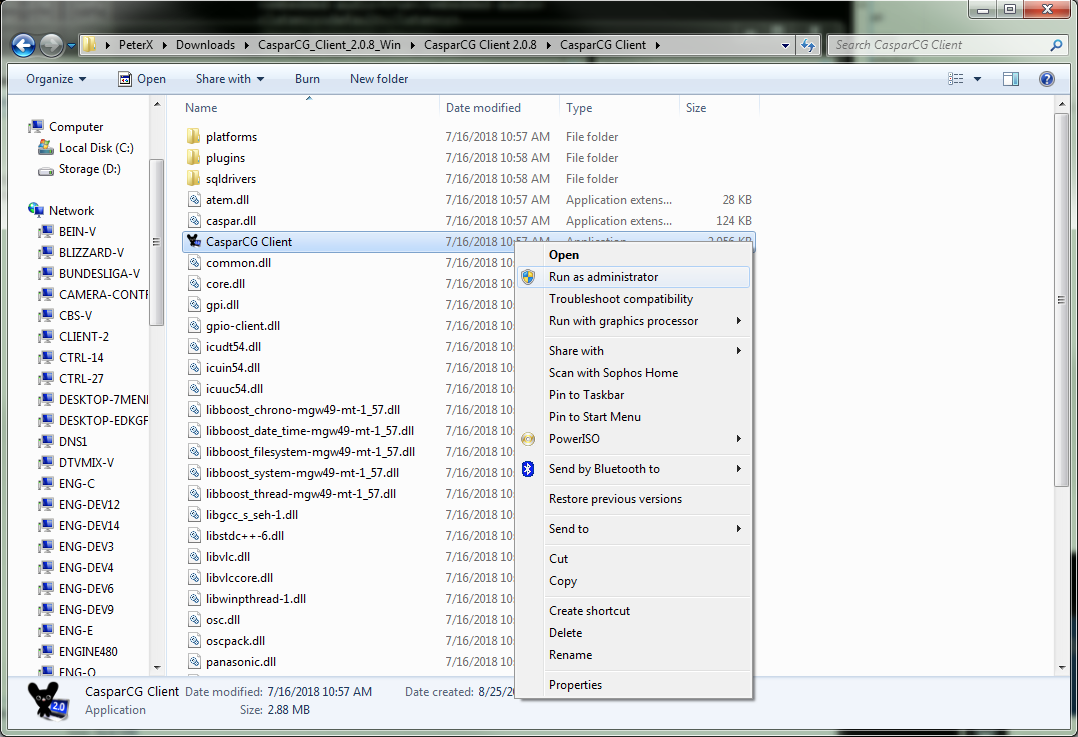
10 - Navigate to CasparCG Client 2.0.8->CasparCG Client to launch the client application. Right click on CasparCG Client and select “Run As Administrator”
-
The application will look like this upon first launch:
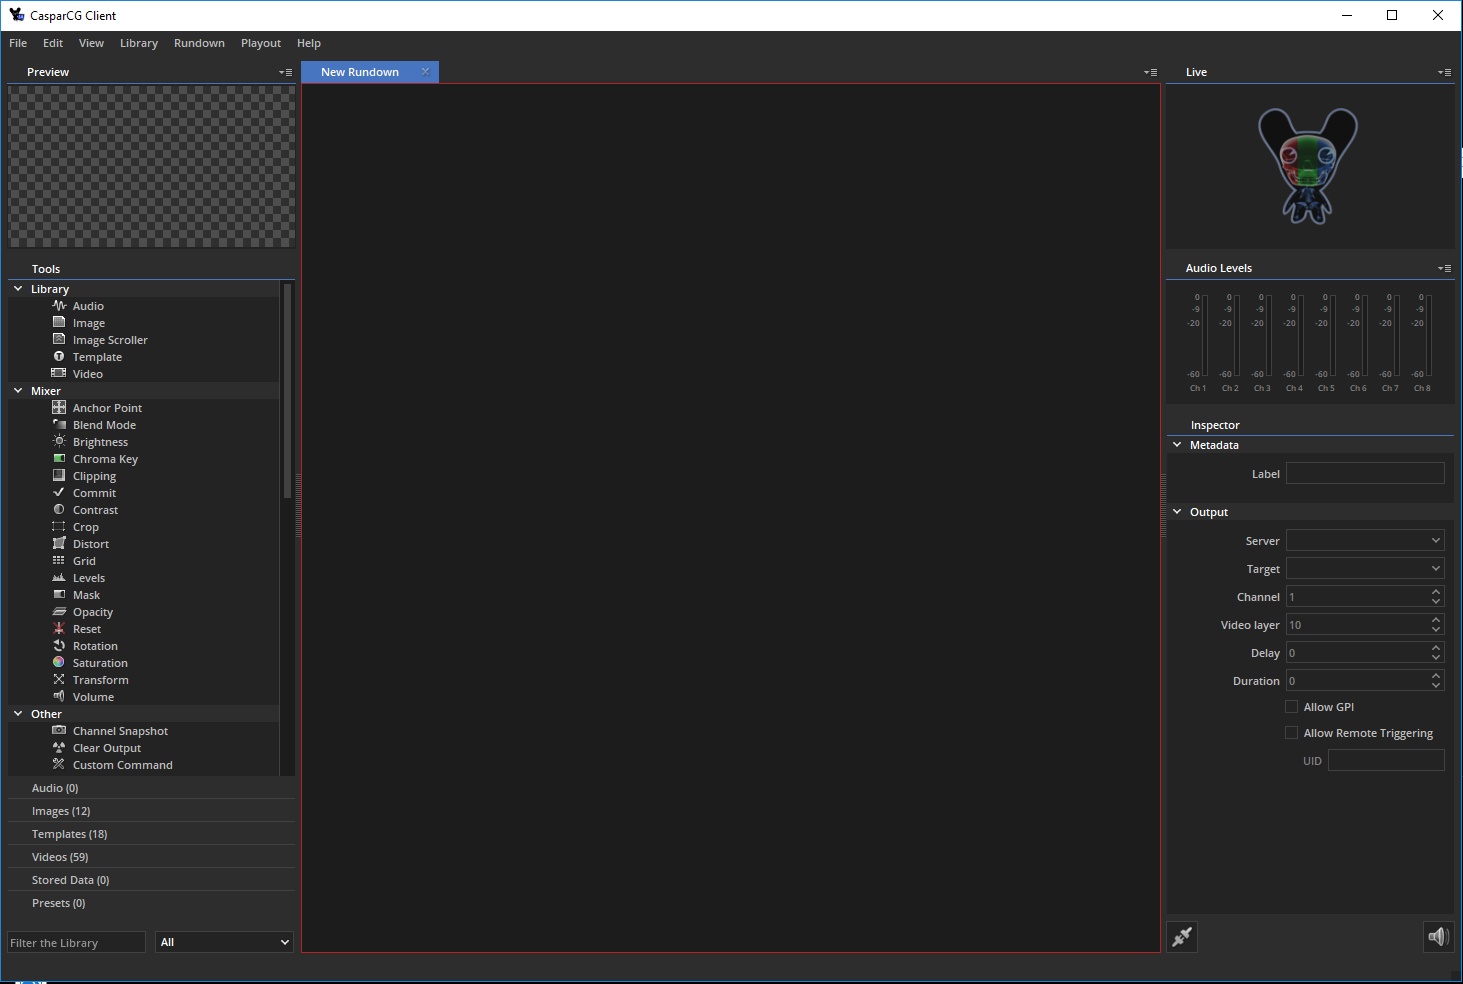
11 - Verify that the client is connected to the CasparCG Server. This is done by going to Edit->Settings
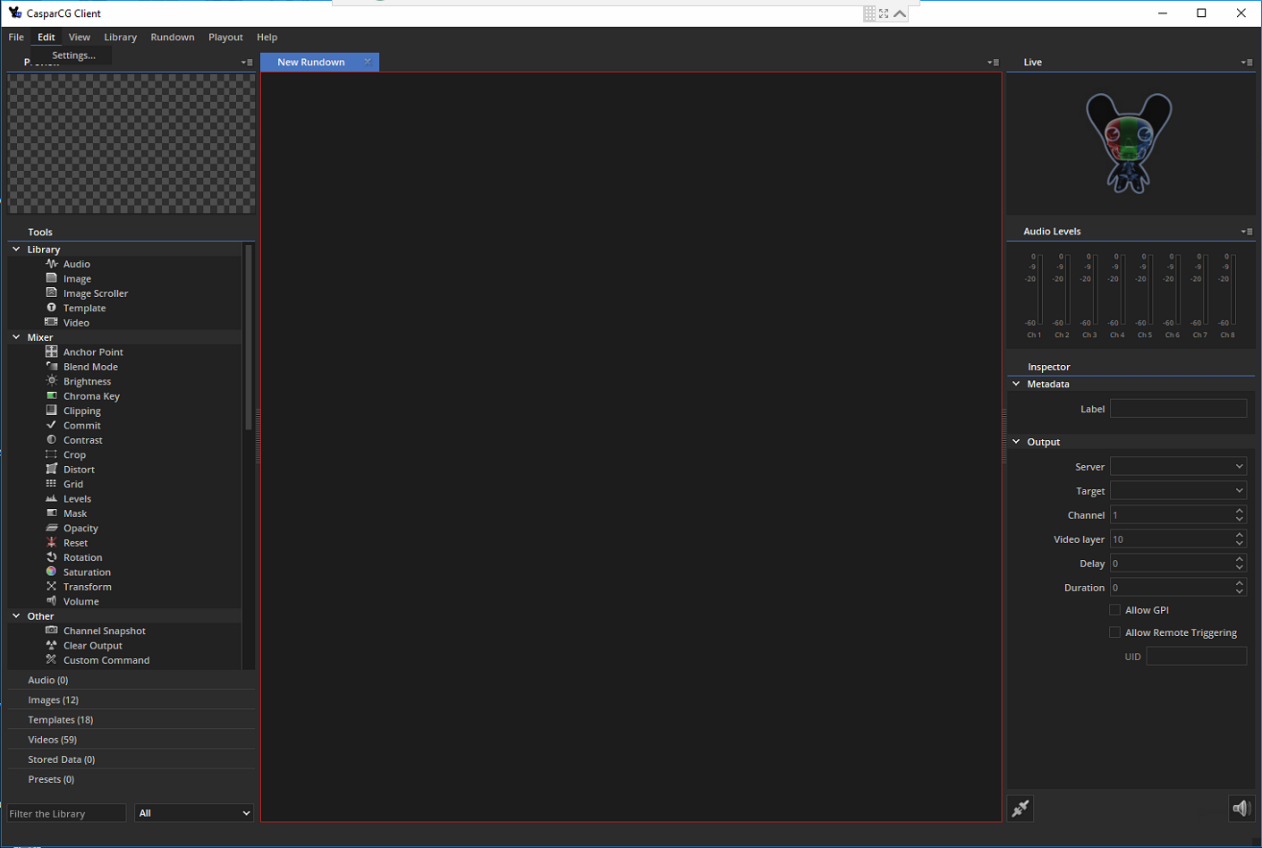
12 - Navigate to the Server tab and verify that the server you want is on the list. If you are doing this setup as an All-In-One which means that the CasparCG Server and CasparCG Client will be running on the same computer then the IP Address of the server you want should be 127.0.0.1
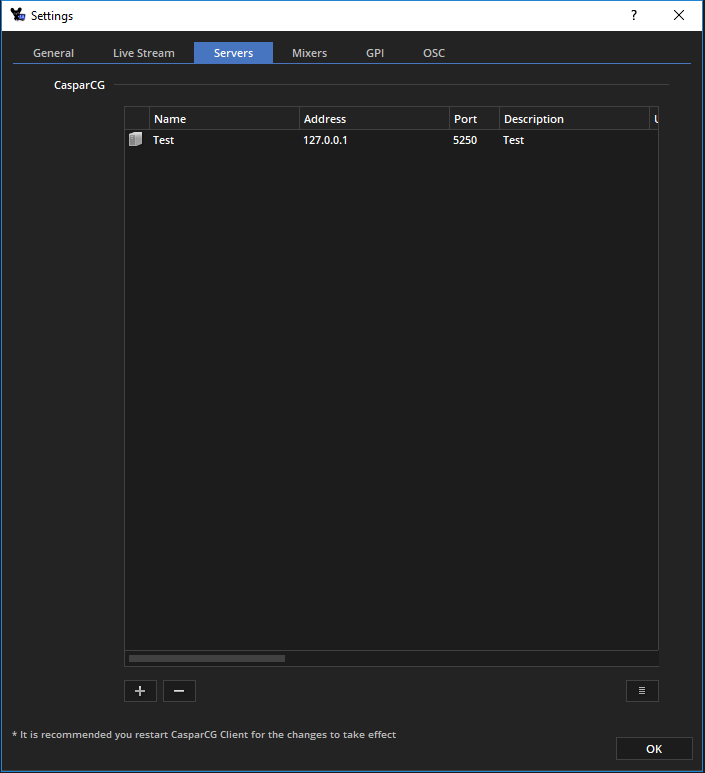
If CasparCG Server is on another computer, then you would need to add that IP Address to the list. This is done by clicking on the + icon to get this window where you can put the server information
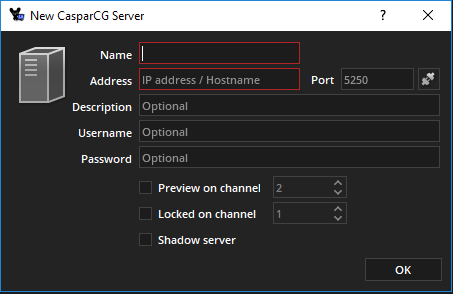
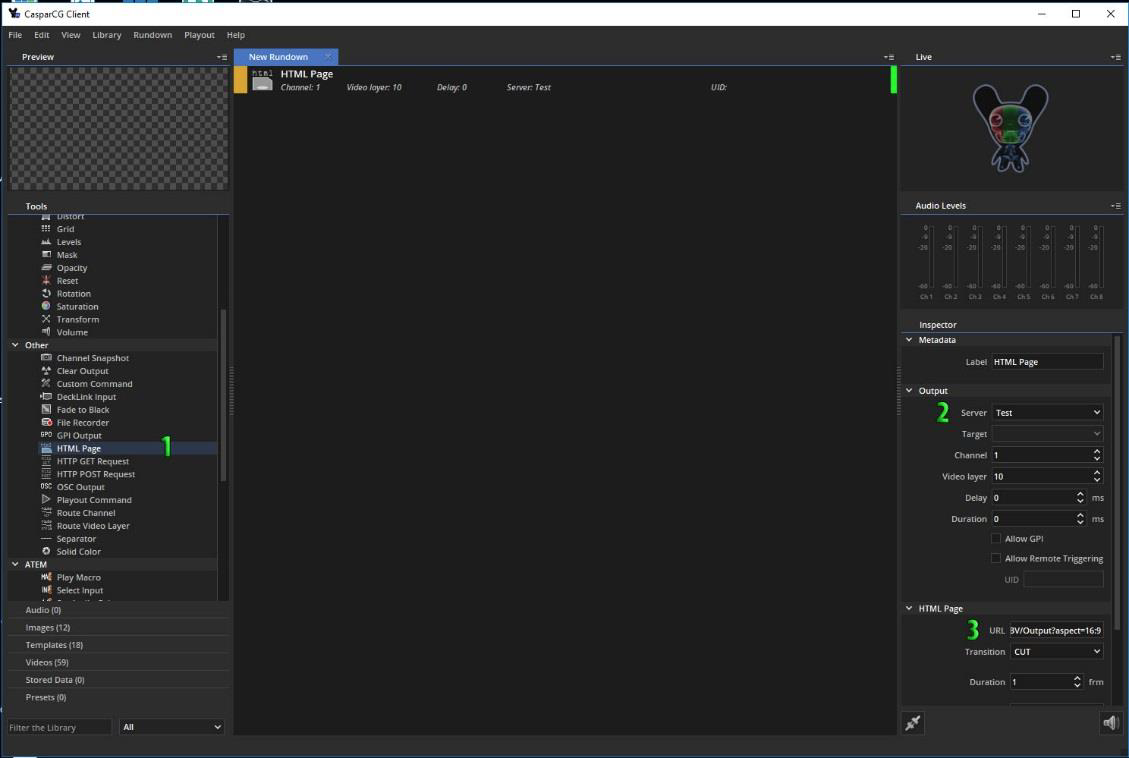
13 - To get Singular to output through Caspar CG, you will need to follow these steps:
Step 1: Select HTML Page and drag it into the New Rundown Area
Step 2: Select the Server that you will use to play out and process the graphics
Step 3: Paste in the Singular link to the URL Text Field
Step 4: Press “F2” to play out the Singular page through CasparCG Server and the Blackmagic Decklink Quad 2 Card.
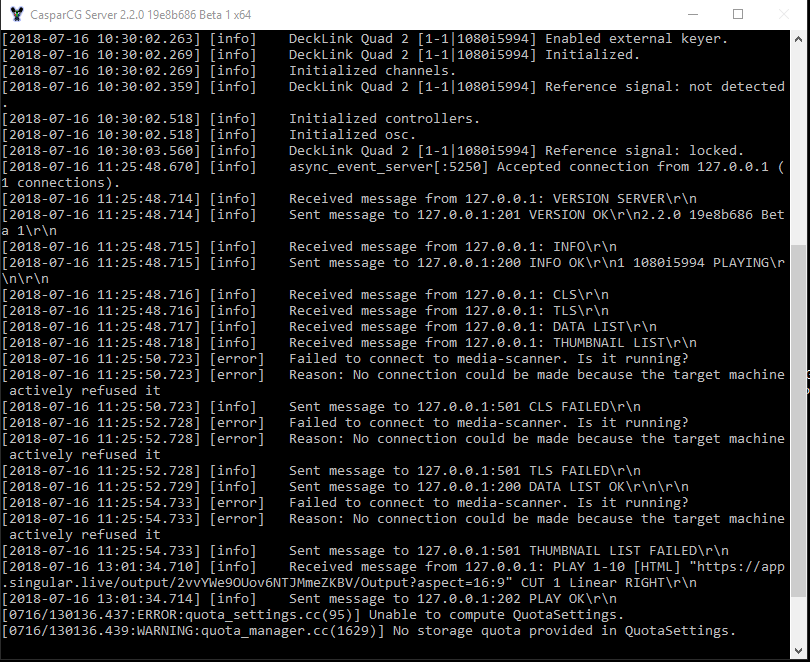
14 - You should then see the CasparCG Server console confirming the message being received and outputting to your monitor now.
Note
For a premiere Singular SDI box solution, contact one of our Certified Service Providers, Reality Check Systems.
Comments
1 comment